Spaghetti squash, like eggs, is one of those foods that gets me so pumped about what food is. It's a squash like any other squash, but then you run your fork through it after baking and BAM! Perfectly formed spaghetti strands. Food can be amazing, and spaghetti squash needs no embellishment, which is why I paired mine with a simple and quick sage and walnut butter sauce. This is a classic sauce...you don't always have to reinvent the wheel in the kitchen. But it pairs so perfectly with the delicate squash, and it's so yummy to boot. Vegetarian or not, this is a fantastic Fall supper.
Ingredients:
1 spaghetti squash, about 2 lbs. (whatever size you use, you just have to adjust the cooking time; if you use a 3 lb. squash or larger, increase the butter to 5 tbsp.)
3/4 tsp. salt
1/2 tsp. coarse ground black pepper
4 tbsp. butter
10-15 fresh sage leaves
1/2 cup shelled walnuts, roughly chopped
1 tbsp. grated parmesan or pecorino cheese
Our 2 lb. squash would serve about 3 entrée sized portions. The 3 lb. (logically) would serve more!
Step 1:
Preheat your oven to 400 degrees with the oven rack in the middle of the oven. Using a sharp knife, carefully halve your squash lengthwise and scoop out the seeds from each half.
Step 2:
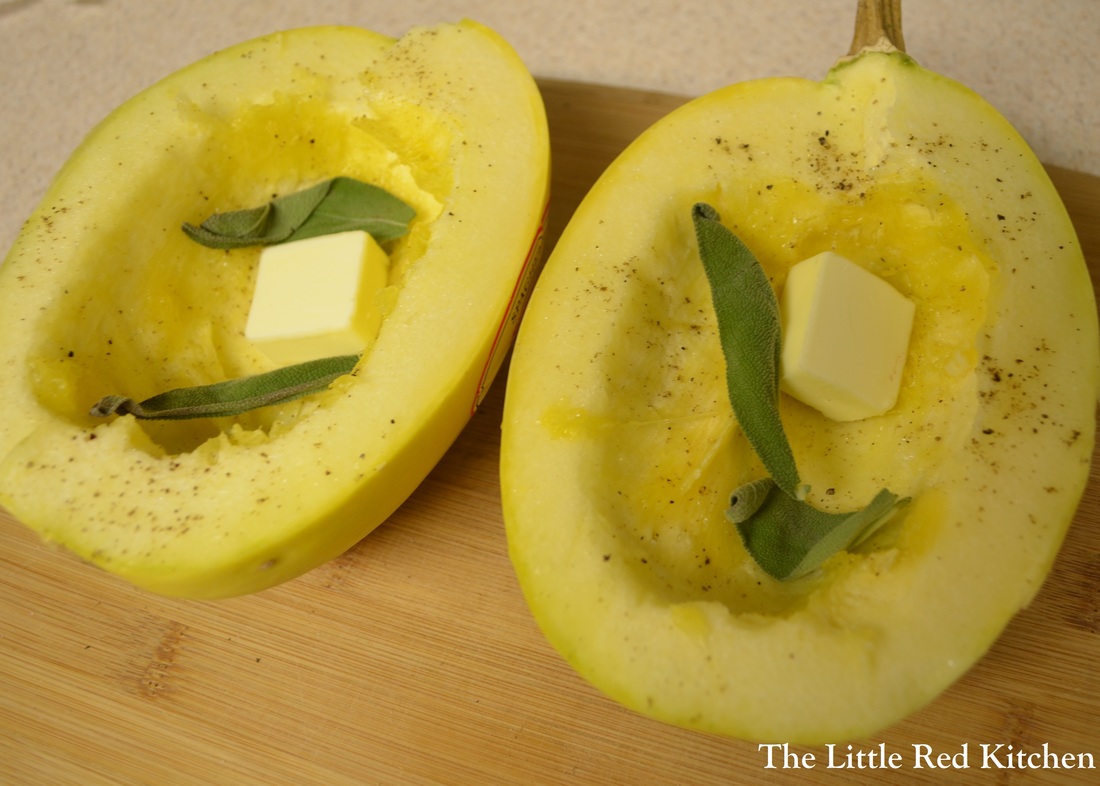
Place each half on a rimmed baking sheet, flesh side up. I put parchment down first, like always, so that in case the squash leaks or bubbles, I don't have to clean up a sticky baking sheet, I just have to throw away the parchment. Season each half with a 1/4 tsp. of the salt and pepper, then place 1 tbsp. of the butter and 2 sage leaves in the hollows of each squash half. 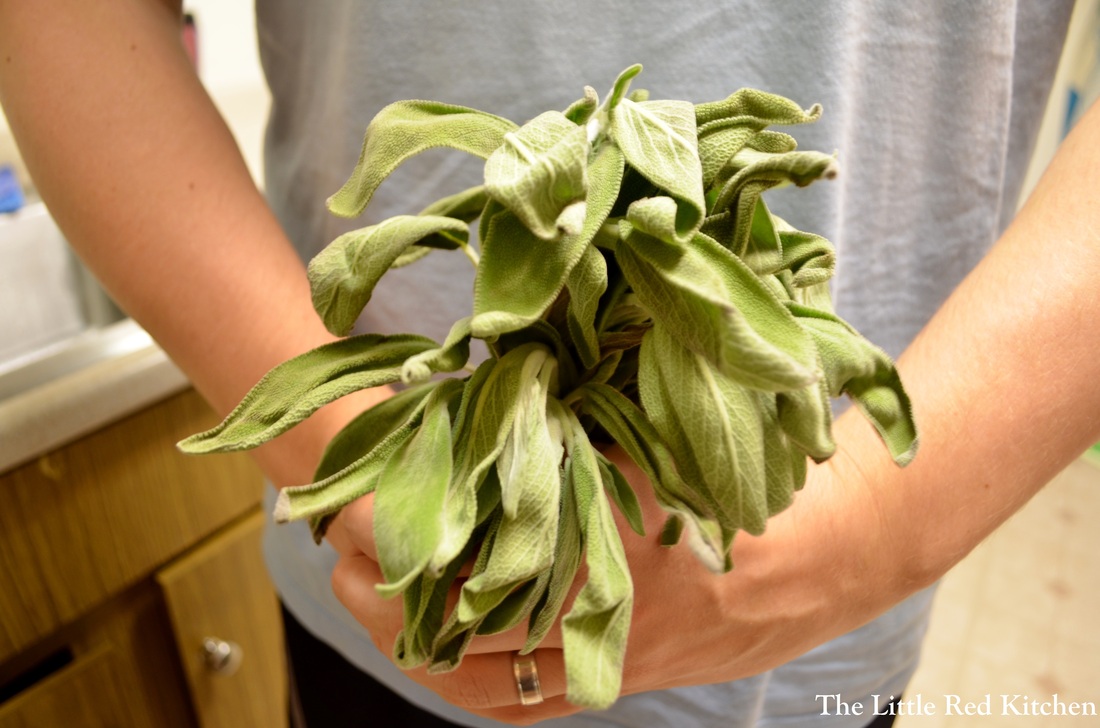 For ME? You shouldn't have <3 Step 3:
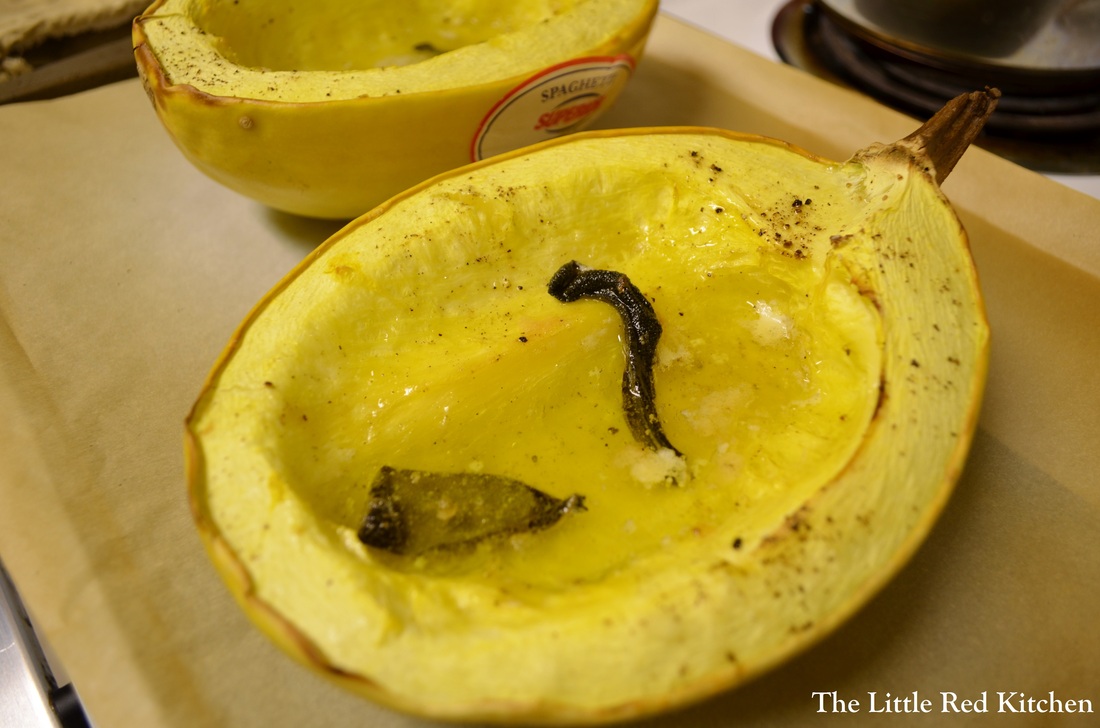
Bake the squash on the middle rack until the flesh is just soft, about 40-45 minutes. For a larger squash, this may be closer to an hour. Remove the squash from the oven and let cool until you can work comfortably with it, about 15 minutes. Step 4:
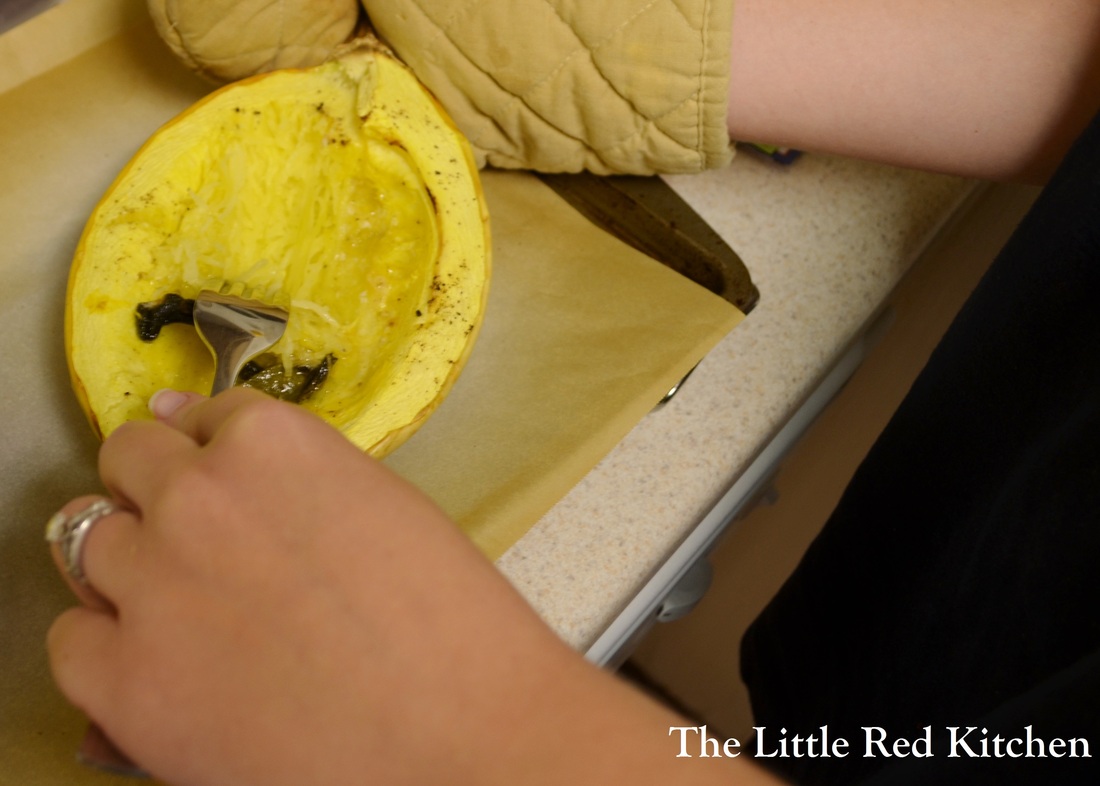
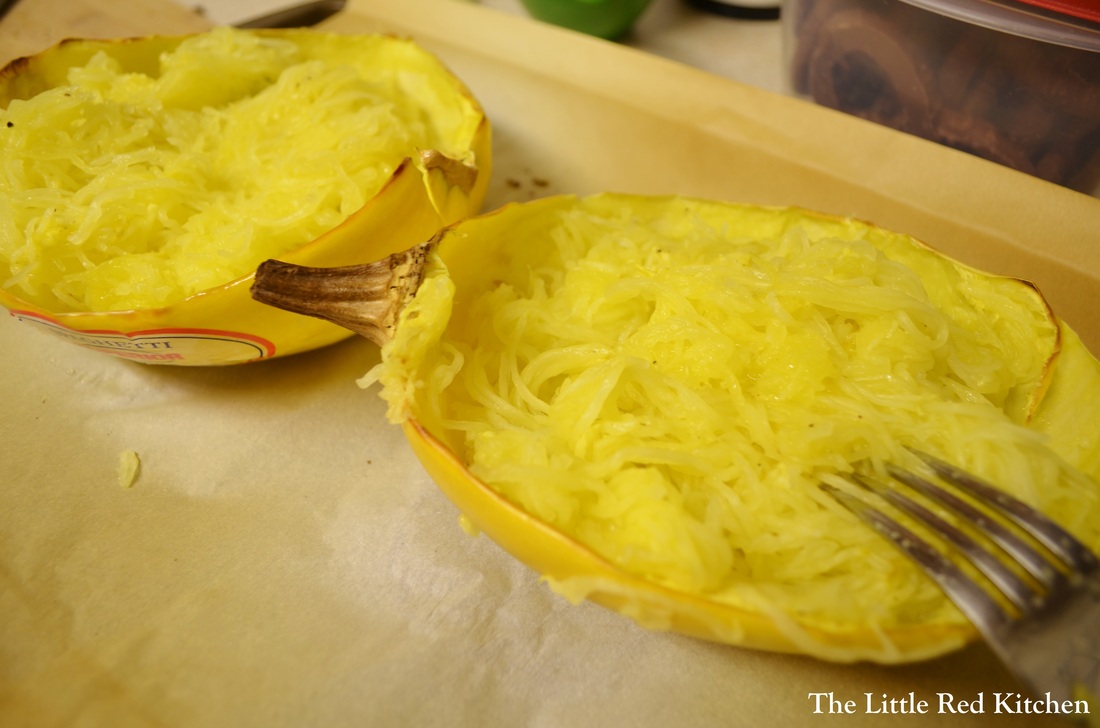
Here comes the fun part. Using a fork, simply run the prongs long-ways across the flesh, and it will form spaghetti strands. Just try to keep that lovely pool of butter in there, tossing it with the squash as you go. The squash is still plenty warm, and the sauce takes a couple minutes to throw together, so just let the squash chill out for a bit.
Step 5:
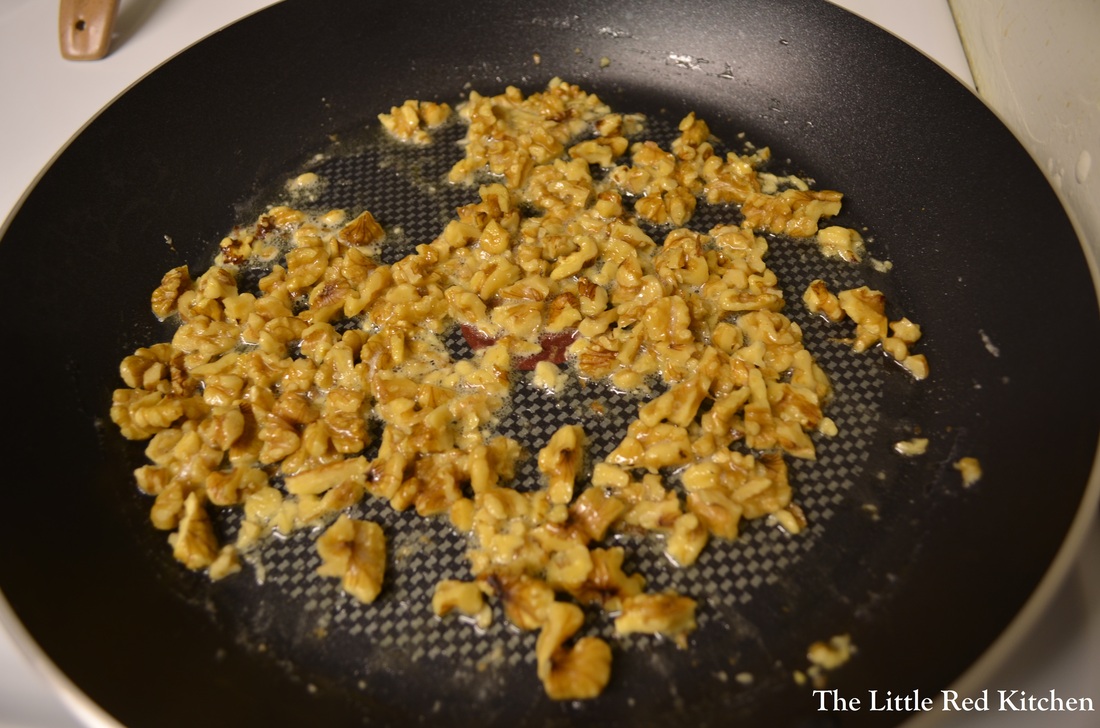
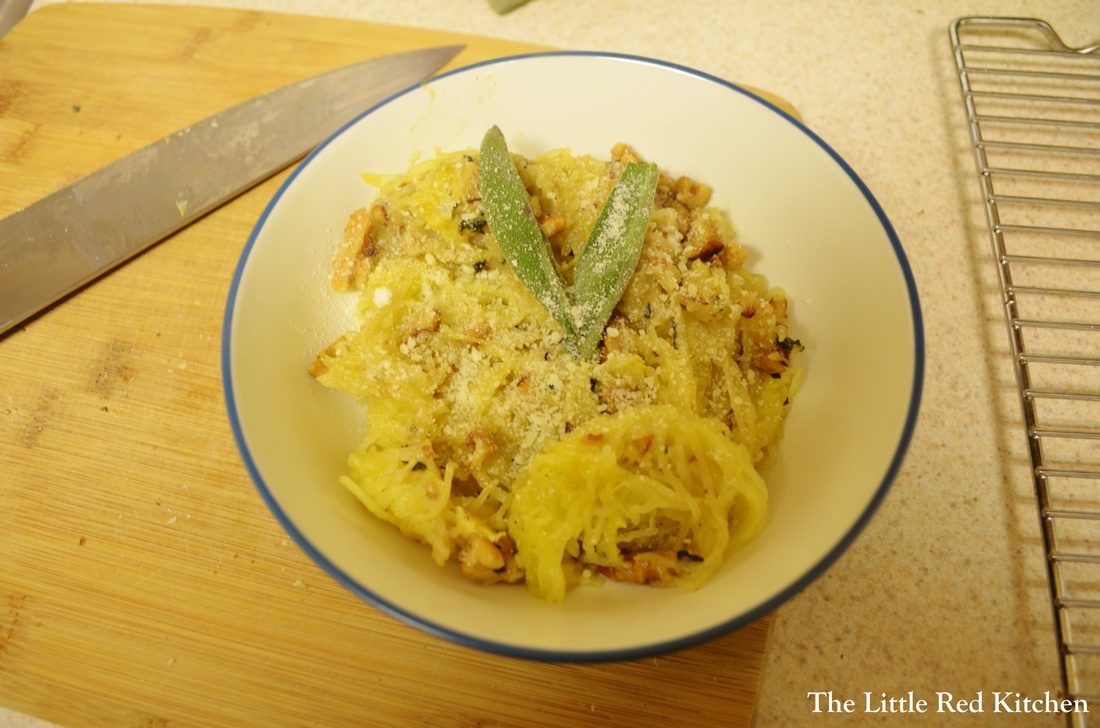
Heat the remaining butter in a large skillet over medium heat, then add the walnuts and toast for about a minute, letting the butter foam and sizzle. Then add the remaining sage leaves and stir them around for about a minute as well, until they start to crackle in the pan. Done! Add the spaghetti to the pan, toss to combine and warm through for about a minute or two. Add the rest of the salt and pepper if you need to and serve, topping with the grated cheese. Both fresh tasting and comforting, this meal will warm your belly up in the best possible way.
Spaghetti squash is a little too delicate for a hearty marinara, but a fresh chunky tomato salsa would work marvelously, as well as an herbaceous pesto, if you'd rather give those a try. Somebody was obviously playing with their food to begin with if they discovered you could turn squash into noodles. So why not play some more? :)
~Lauren
I'm going to keep this brief, mostly because I'm smack in the middle of midterms for grad school, and also mostly because I wrote up this post around 9:00 this morning and it somehow deleted itself... Anyway, let us rejoice, because it is Thursday, and Thursday is a good friend of Friday. And let us rejoice by checking out an awesome recipe for Spanish Manchego Stuffed Pork Burgers, which I made for my Dinner Party last weekend and which were requested to appear on the blog in recipe form! Ingredients: 2 tbsp. vegetable oil 1/4 cup pimiento-stuffed Spanish olives 4 cloves garlic 1 tbsp. dried oregano 1 tbsp. chili powder 2 tsp. smoked paprika 1 tsp. ground coriander 1 tsp. ground cumin 1/2 tsp. ground allspice 3 tbsp. mayonnaise 1 1/4 lb. coarsely ground pork Kosher salt and freshly ground pepper 1/4 lb. manchego cheese, shredded on the large holes of a box grater or in a food processor 4 large soft hamburger rolls, split This recipe makes 4 burgers. It comes from an old issue of Food Network Magazine. Which reminds me of another tip for entertaining; having guests over is not the time to experiment with weird foods, techniques, ingredients, etc. Stick to what you know! Your friends and family wouldn't judge you if you messed up dinner, but why even risk it when you can make something you already know will turn out wonderfully? This doesn't mean, be boring. It just means to calculate your cooking risks! Step 1: Combine the vegetable oil, garlic, olives, and all the spices (not including salt and pepper) in a food processor or mini food processor and process until smooth. Scrape into a large bowl and stir in 2 tbsp. of the mayonnaise. Step 2: Add the pork to the mixture along with salt and pepper (about 1/2 tsp. of each) and use your hands to gently combine. You want to make sure everything is evenly distributed, but try your best not to compact the meat or overwork it. Step 3: Now you have to make the patties and stuff them with the cheese. This is the best way I've found to do it. Divide the pork evenly into 4 sections. Then take one section and divide that in half. Shape one half into a burger patty, about 1/4 inch thick, then sprinkle 1/4 of the cheese on top, pressing it into the meat ever so slightly. Then, take the other half of the pork, form a similarly sized patty, and sandwich it on top of the cheese-topped patty, pinching and folding the edges shut as you go. None of the cheese escaped and burned when I used this method! Step 4: This recipe called for grilling the burgers, but that's not my M.O. so I seared them on the stove, which, to be honest, is the way I prefer my burgers. But if you want to grill these bad boys, feel free! After you have formed your 4 patties using the method in step 3, preheat a 12 inch nonstick skillet over medium-high heat for a couple minutes. Place the burgers in and cook for 5-6 minutes. Don't press on them or do anything to them! Just let them brown. Then flip and cook for another 5 minutes and remove to a plate. If you are not using a nonstick pan, brush each side of the burgers with a little vegetable oil to prevent sticking. I have also used my retro flat-top electric griddle to grill multiple burgers at once, and this works beautifully. Step 5: Almost there! Crank the heat to high on the pan and brush the remaining tbsp. mayo on the inside of the buns and place them in the pan, mayo side down, for just about a minute, so they get slightly browned and toasty. Top with the burgers and add whatever condiments you want though I promise you, these delicious things need no embellishment. Like I said in my post, since the forming and stuffing of the burgers can be finicky, I did that an hour in advance of my friends coming over, put them on a sheet tray covered with plastic wrap and left them in the fridge till I needed them. Easy! Disclaimer, burgers are literally my favorite food in the world, and I can be picky about them. I actually don't like fancy burgers; the simpler, the better, but these are the one exception to the rule. I can't get enough of that robust spice blend, the moist meat, and the amazing manchego inside, which just happens to be one of the best cheeses ever. The next time you are reaching for the ground 80/20 for burger night, consider giving these a try! ~Lauren
Talk about some comfort food!
Okay, so comfort food is something we all crave when the weather turns. I don't know if it's from childhood memories or it's more primal than that, but something in our bellies wants stick-to-your-ribs goodness this time of year. Unfortunately, that goodness comes at the price of pants buttons popping and food-induced comas. So I wondered to myself, does comfort food have to give us that feeling that we never want to even look at food again?
That being said, I decided to tackle the classic Southern American dish, chicken and dumplings, and make it a little less heavy. By creating a broth-based soup, instead of a thick gravy, and by adding tons of veggies and fresh herbs, I think I may have done just that!
Ingredients:
Stew:
2 large chicken breasts, trimmed of excess fat
kosher salt and pepper
2 tbsp. olive oil
1-1.5 cups chopped yellow onion (1 medium onion)
2 garlic cloves, minced
1 sprig of fresh thyme (substitute 1/2 tsp. dried thyme if you need to)
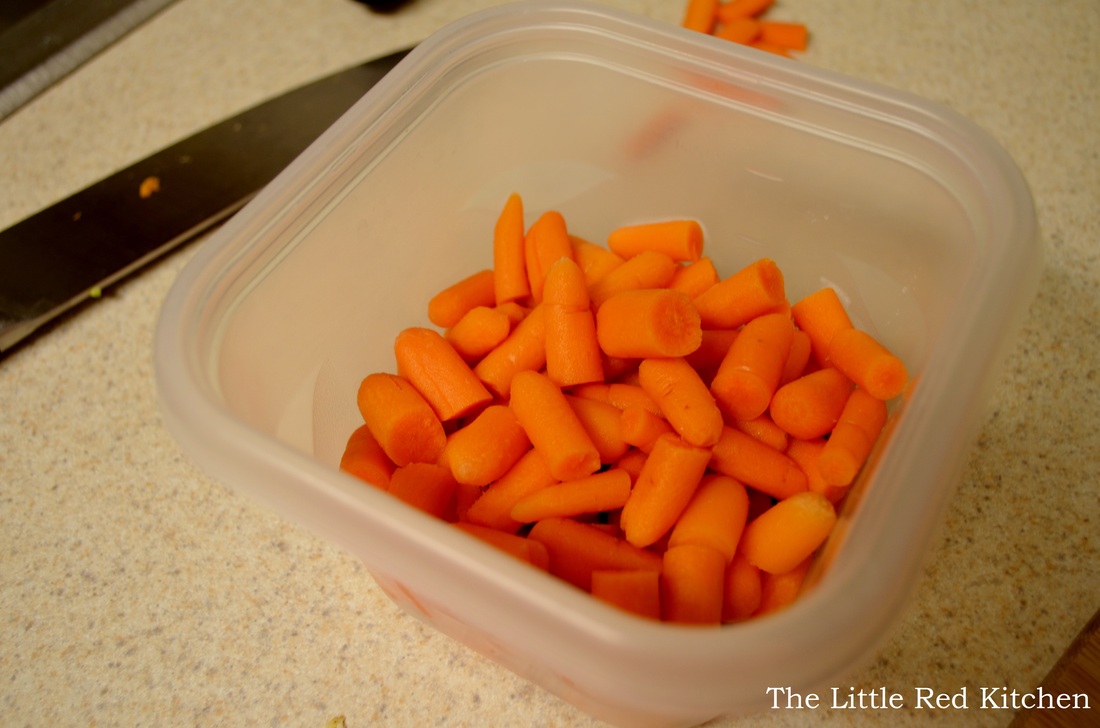
2 cups of carrots, chopped into roughly 1/2-inch pieces (believe it or not I only had baby carrots on hand so I simply cut them in half!)
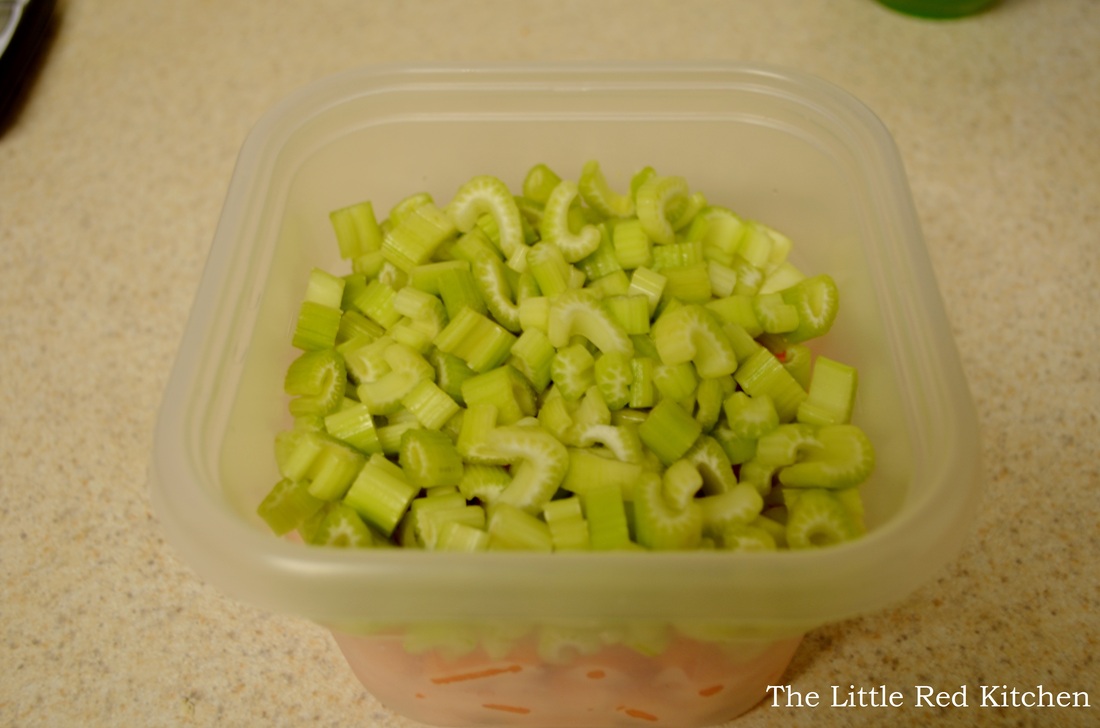
1 cup of celery, stalks chopped 1/4-inch thick
1/4 cup flour
6 cups chicken stock (I don't need to tell you that homemade is better. I happened to have some in my freezer, but 90% of the time I don't, so low sodium chicken stock is A-Okay)
1 cup water
3 tbsp. chopped fresh dill, divided in half (use 1.5 tbsp. if substituting dried dill)
4 tbsp. chopped fresh parsley, divided in half (dried parsley is like rabbit food. do NOT substitute.)
Herbed dumplings:
2 cups all-purpose flour
1/2 tsp. kosher salt
1/8 tsp. ground black pepper
1 tbsp. baking powder
1/2 cup heavy cream
1/2 cup buttermilk (You may use a whole cup of heavy cream if you wish, and omit the buttermilk)
2 tbsp. butter
*I forgot to count as I was making them, but I think the dumpling batter makes about 20 dumplings, if not more. This dish will definitely serve up to 6 people.
Step 1:
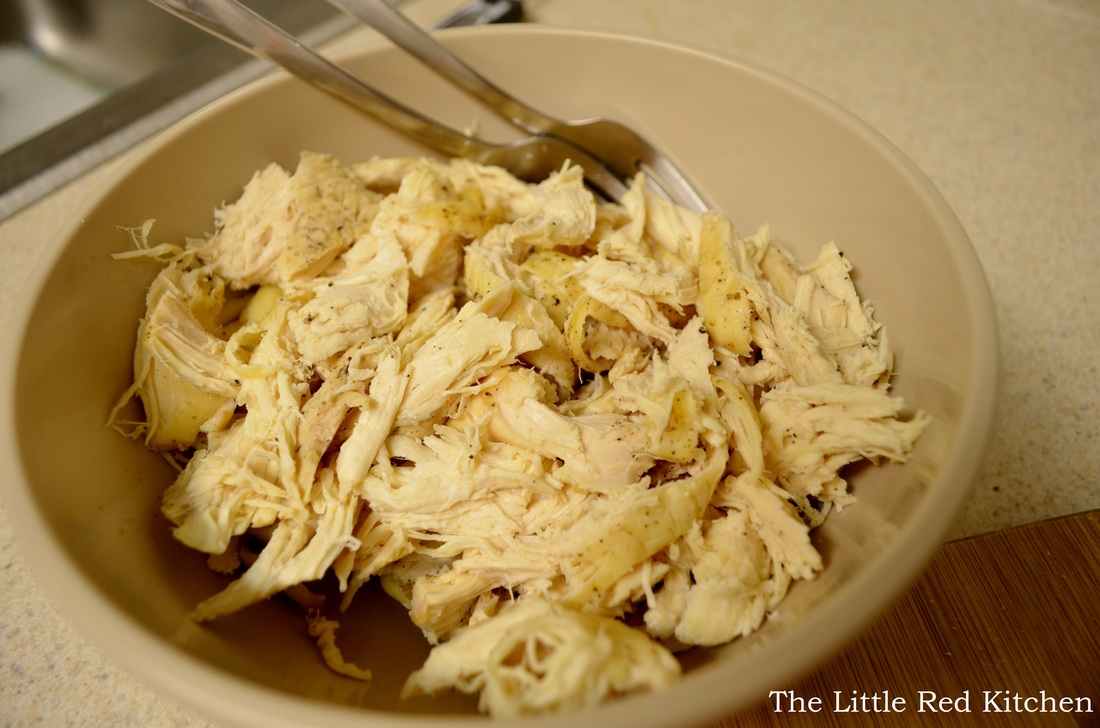
Pre-heat oven to 375 degrees. Season both sides of the chicken breasts with kosher salt and pepper and place on a rimmed baking sheet (I almost always use parchment paper because it makes clean-up a breeze.) Bake on the middle rack in the oven for 20-25 minutes, or until the chicken's internal temperature registers 160 degrees. Allow to cool, then using 2 forks, break the chicken up into large shreds. You should get 3-4 cups worth. Cover and set aside. A small note, I prepped almost everything in advance and just left it in the fridge for the afternoon. Come dinner time I just had to assemble the soup and make the dumplings, which made things so easy! Step 2:
Pour the olive oil in a Dutch oven or heavy-bottomed large pot and turn on to medium-low heat. Add onion, 1/2 tsp, of kosher salt and 1/4 tsp. of black pepper. Cook until the onions are softened and slightly translucent, 5-7 minutes. (Keep the heat on medium-low, we're not looking to brown!)
Step 3:
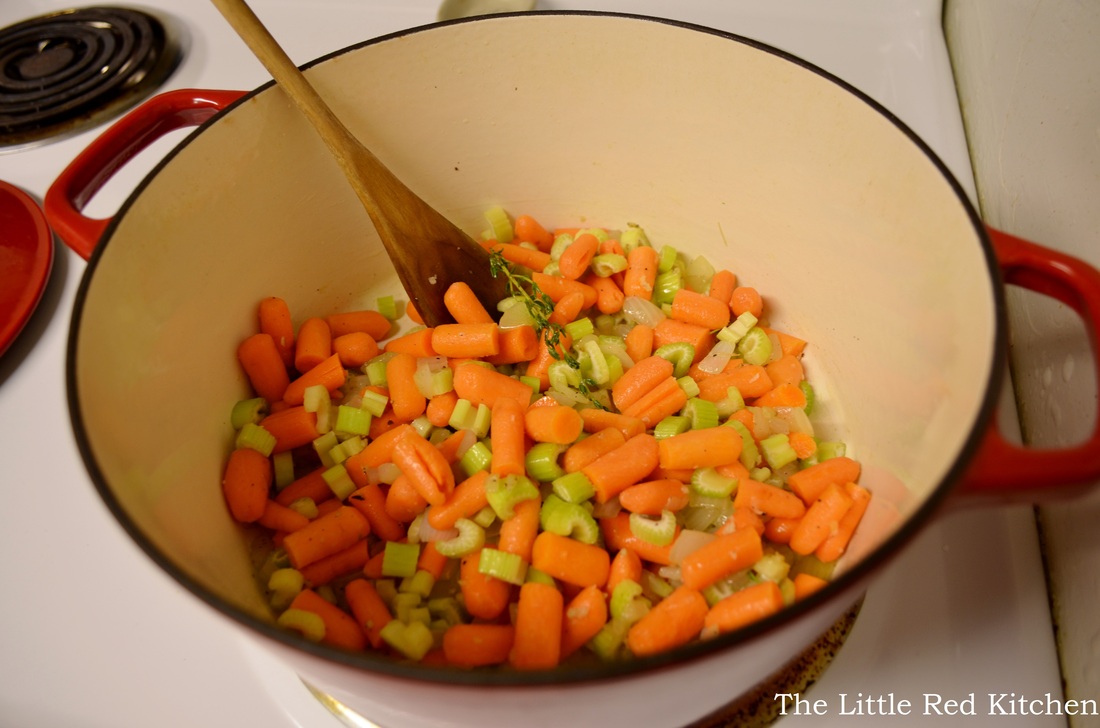
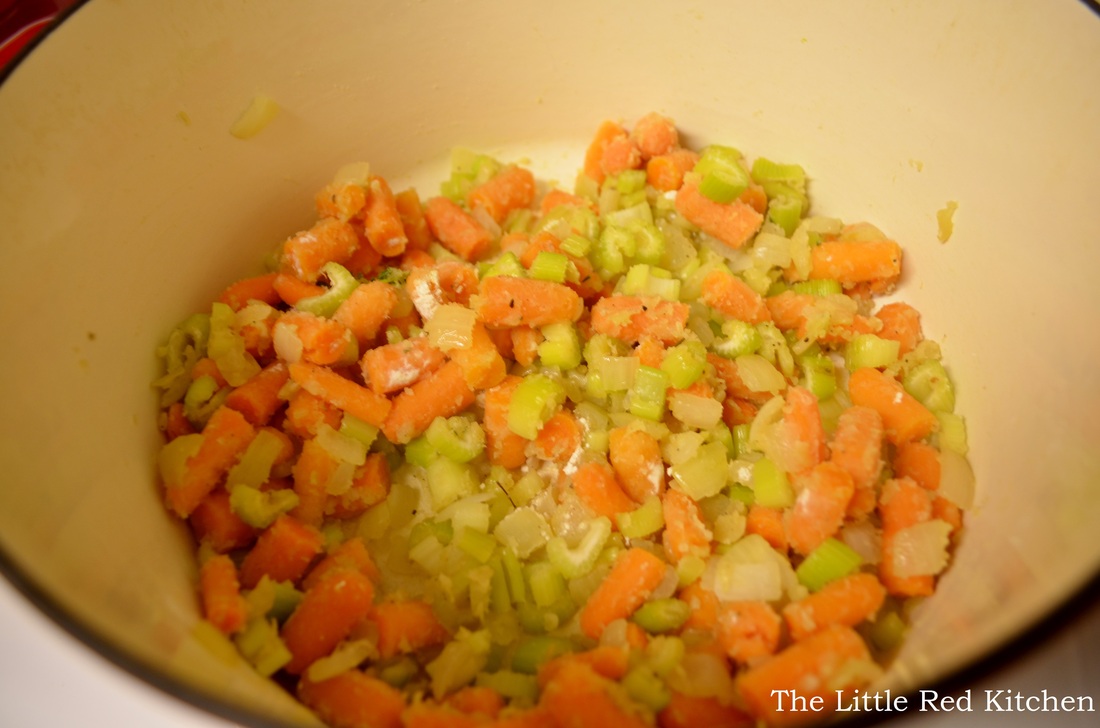
Add the minced garlic and thyme and cook for 30 seconds, until fragrant. Then add the carrots and celery. Stir to combine. Cover and cook for about 10 minutes, until the carrots have softened slightly and the celery is turning translucent, stirring halfway through.
Step 4:
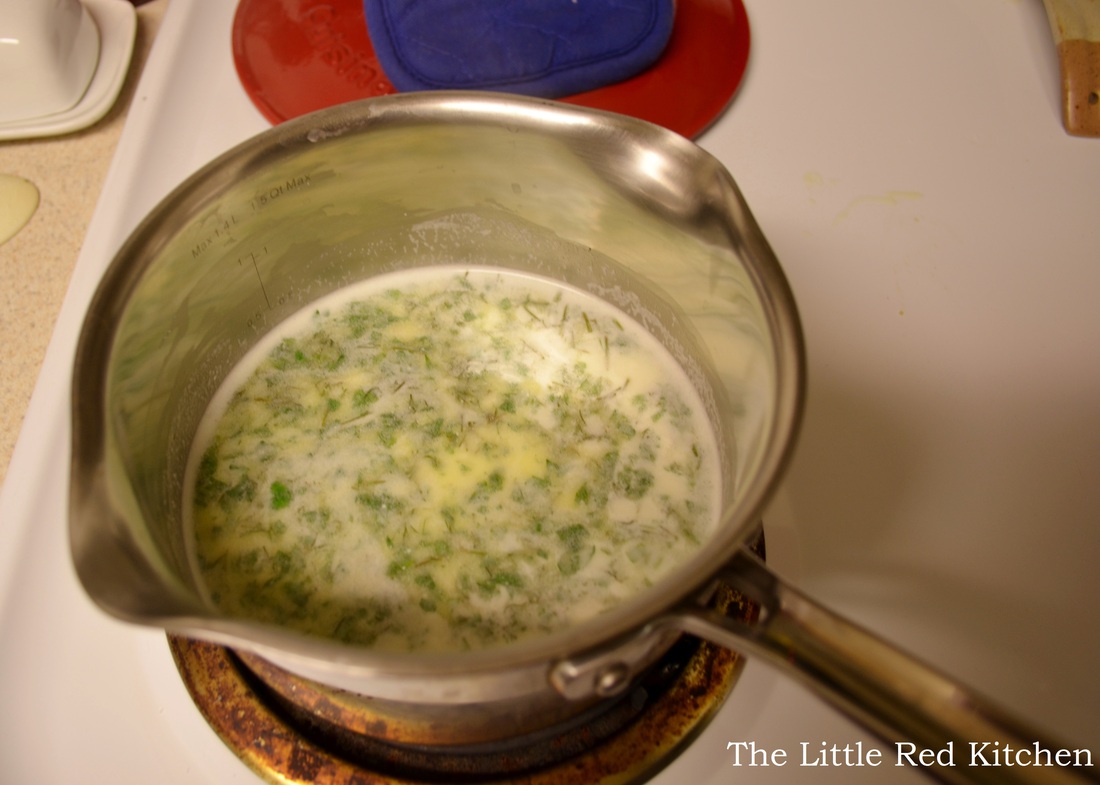
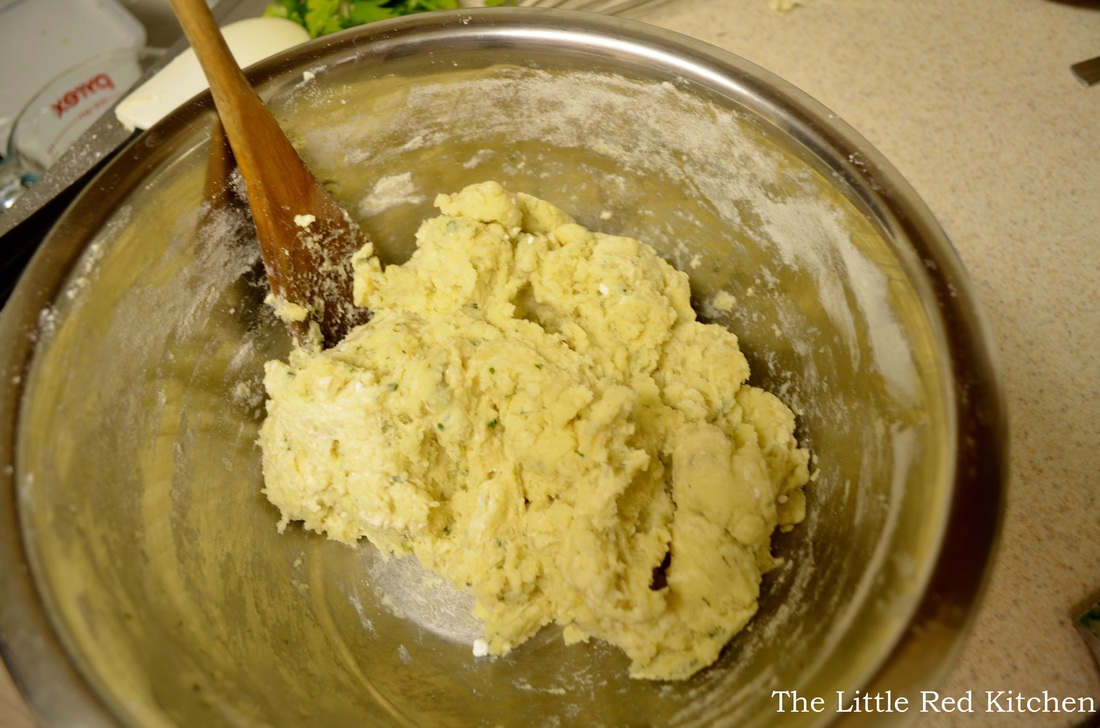
While the carrots and celery are cooking, it's a good time to form the dumpling dough, which doesn't take long at all. Combine the flour, salt and pepper, and baking powder in a medium-sized bowl and stir to combine. In a small saucepan, combine the heavy cream, buttermilk, butter, and half of the total dill and parsley. When it just comes to a simmer, pour it onto the flour mixture and stir just enough so that the dough comes together. I had to add a couple extra tablespoons of buttermilk, which is sometimes necessary. Just try your best not to overwork the dough. Step 5:
When the 10 minutes are up on the veggies, add the 1/4 cup of flour and bring to medium heat, stirring the flour in until it looks gummy and weird, about a minute. Step 6:
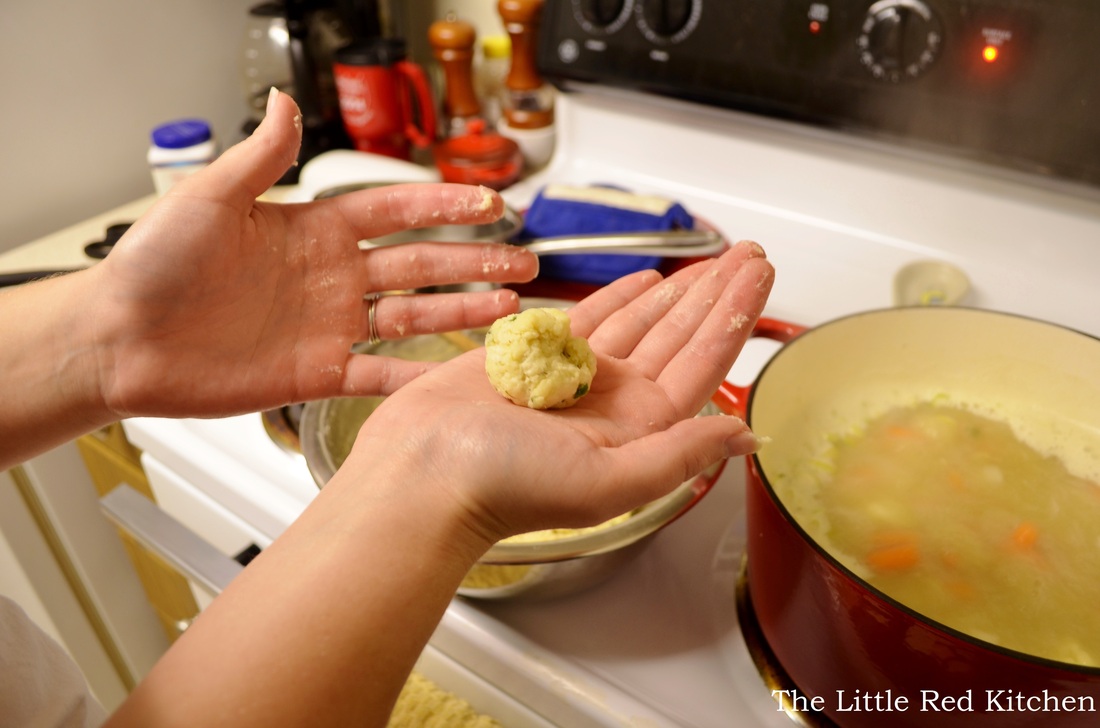
Pour the chicken stock and water into the pot and bring to a boil. Once the stew reaches a boil, lower it to a simmer (medium-low), fish out the thyme sprigs and start forming the dumplings and dropping them into the pot. Just grab a couple tbsp. at a time, and roll them into loose dumplings, about 1.5 to 2-inches big. Once they are all in there, place the lid on the pot and simmer gently for 25 minutes. I had a boil over. So when I say gently, I mean it. In fact, if your stew is even close to the top of the pot, leave the lid slightly off and check on it often!
After 25 minutes, turn the heat off and take the pot off the burner. Gently stir the chicken and the remaining fresh herbs into the stew and allow to sit for 5-10 minutes. Then serve! This stew has a fantastic consistency! It's thicker than a chicken noodle, but not as heavy as a dumpling gravy. And the fresh herbs are such a welcome addition to the whole dish! I particularly love the buttery, dill-y dumplings, which are just the right size that you can eat 3 or 4...or 5, or 6...and not hate yourself for the next 2 hours. The next time you are hankering for some home-cooked comfort, consider tucking in to a steaming bowl of this. :)
~Lauren
Let's just get one thing straight: I'm a fan of Swiss Miss hot chocolate. I am, and I've had those more "gourmet" brands that come in their individual pouches and cost probably much more than a cup of hot cocoa ever should...but, when I came across this recipe 2 years ago that promised super thick and creamy hot chocolate, and it was right in the middle of a cold and bleak Pennsylvania February, I knew I had to try it. And I'm so glad I did because it. is. unbelievable. Give this recipe a try once. Like I said, I've saved this cut-out from a magazine for 2 years, and it's not going anywhere anytime soon.
Ingredients:
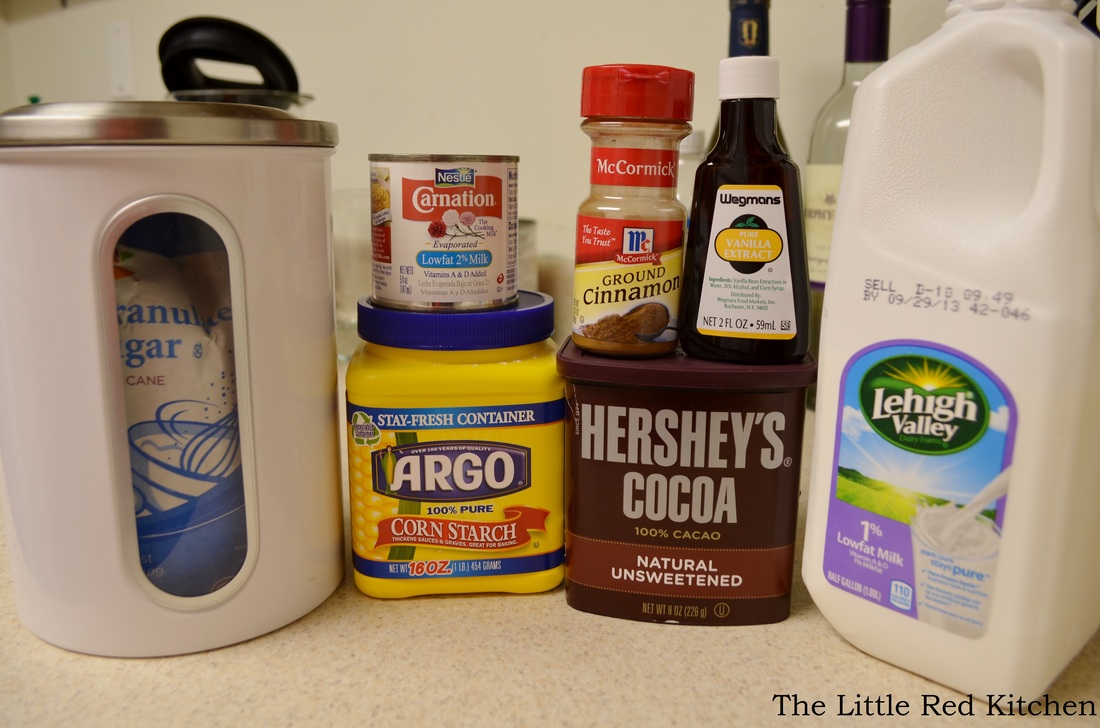
1.5 cups of milk (if you want to be decadent you can use whole milk but I use 1% because that's what we always buy)
5 oz. evaporated milk (The full contents of 1 of those mini cans)
1/4 tsp. vanilla extract
1/8 cup cocoa powder
1/8 cup sugar
1 tbsp. cornstarch
1/4 tsp. ground cinnamon
pinch of salt
This recipe will make 2 drinks and can double easily to make 4. I know, that seems like a lot of ingredients for a couple cups of cocoa. But, level with me here, because it only takes about 5 minutes to whip up.
Step 1:
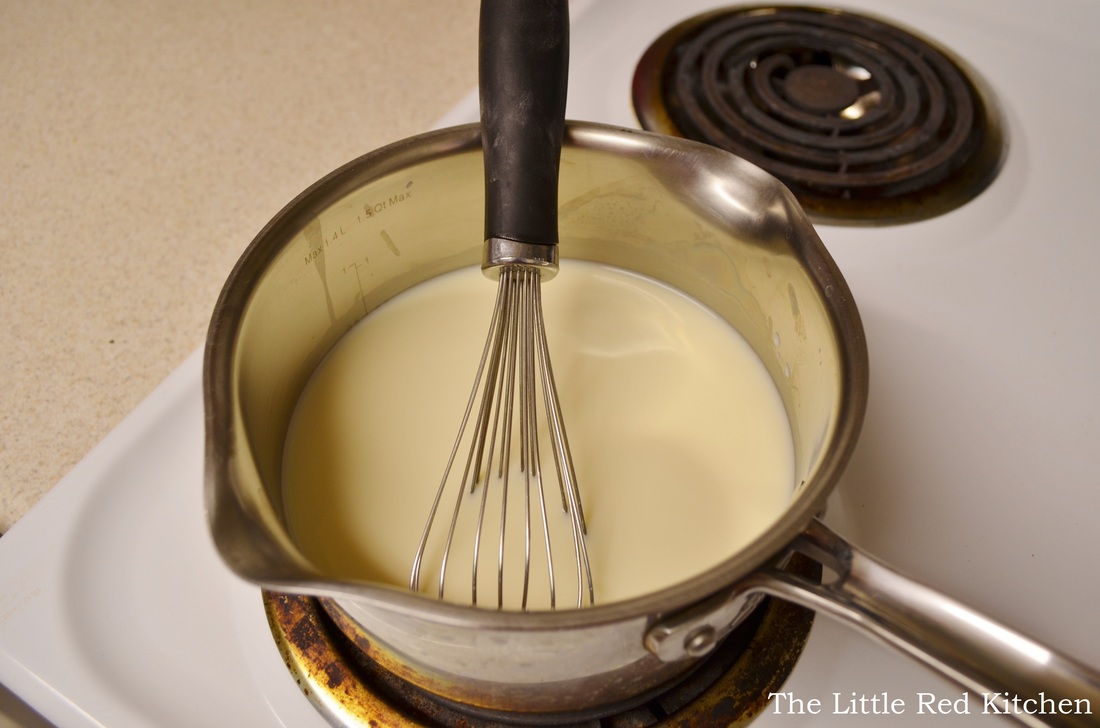
Combine the milk, evaporated milk, and vanilla in a small saucepan and warm up over low heat on the stove.
Step 2:
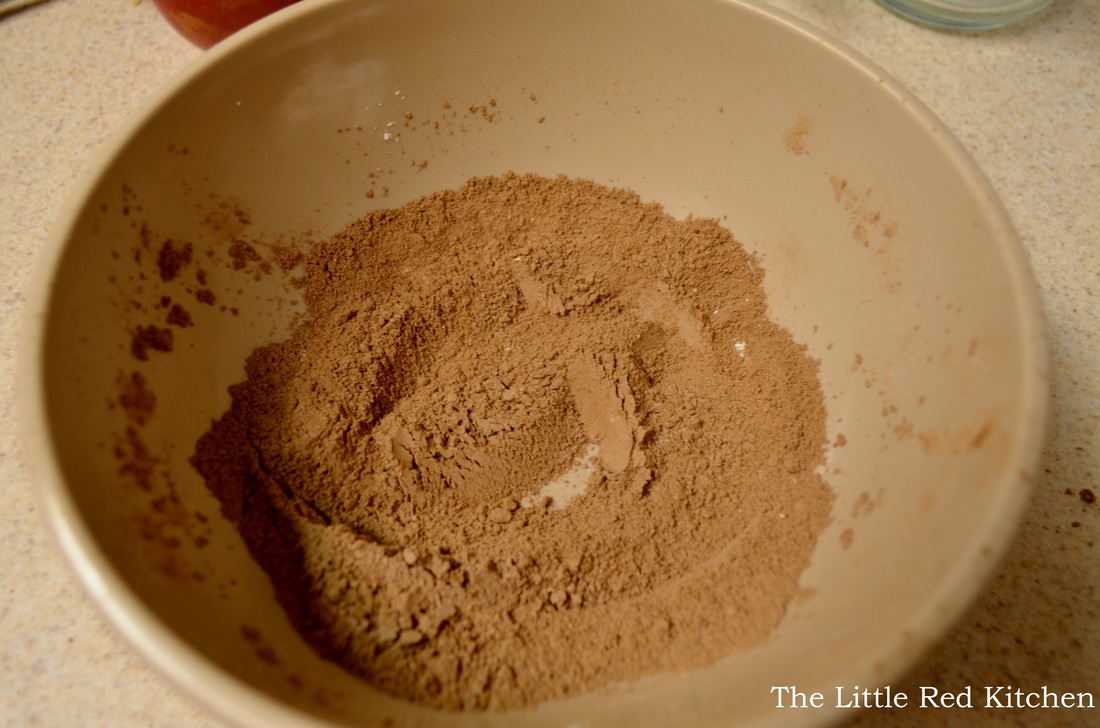
Meanwhile, in a small bowl combine the cocoa powder, sugar, cornstarch, cinnamon, and salt. Step 3:
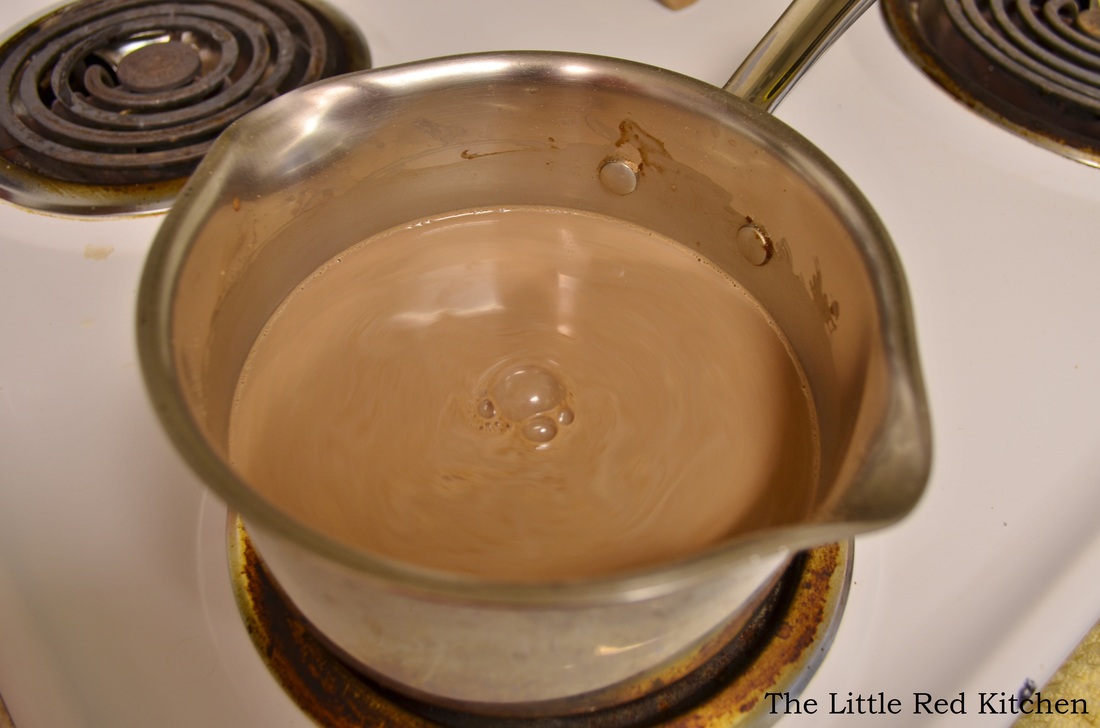
Whisk the cocoa mixture into the milk mixture until smooth. Bring to a boil, whisking a LOT to keep anything from burning on the bottom of the pan. This should take a couple minutes. Once it comes to a boil, remove from heat and serve! The hot cocoa will be super thick, and it will have excellent chocolate flavor, better flavor than you've ever gotten out of a pouch in your life. Note, if you don't drink the cocoa and let it sit around, it might form a thin "skin" on the top from the cornstarch. It's no big deal at all, just give it a stir when ready to serve. And be glad, because it's doing that because it doesn't contain any preservatives or artificial ingredients!
This cocoa really doesn't need any embellishment, but if you feel so inclined, especially if you are having friends or family over for dinner and want to serve something special with dessert:
~add a pinch more cinnamon and a pinch of cayenne to make Mexican hot chocolate
~add instant coffee for that smooth mocha flavor
~make it more "adult" and add peppermint schnapps; um, can you imagine drinking that on a cold December night? Heaven on earth!
I actually keep a couple mini cans of evaporated milk in my pantry for whenever I feel inclined to make this wonderful treat. I hope you'll do the same, and I hope you'll give this deliciously decadent beverage a try!
~Lauren
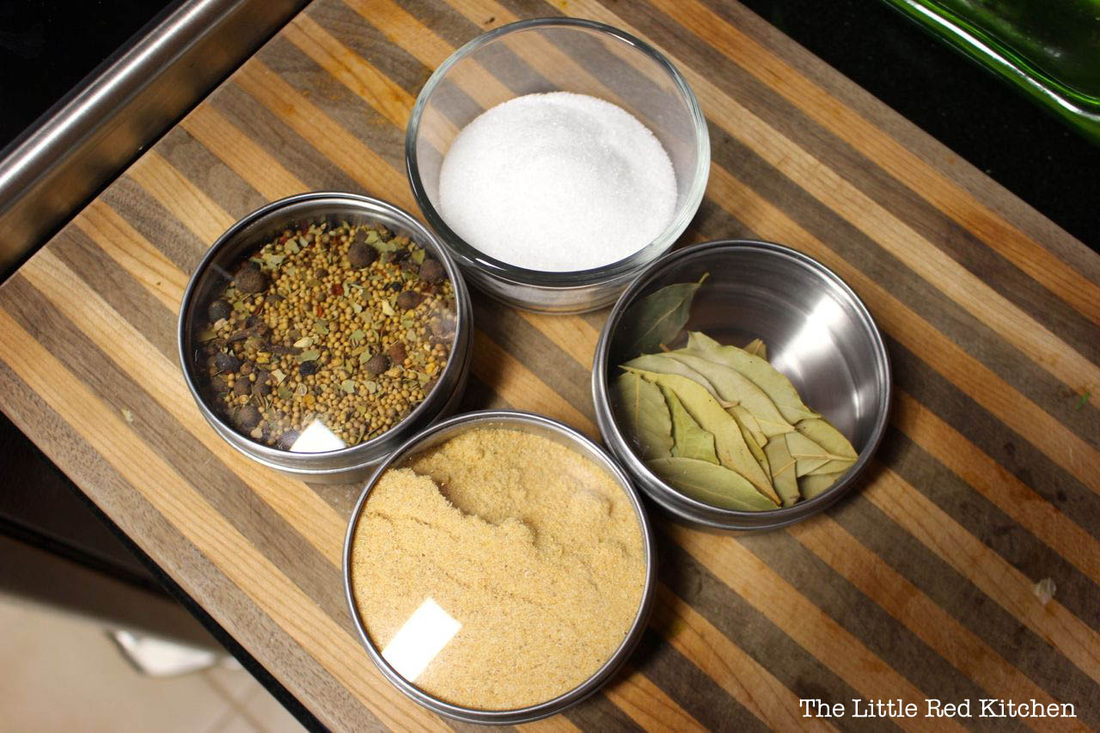
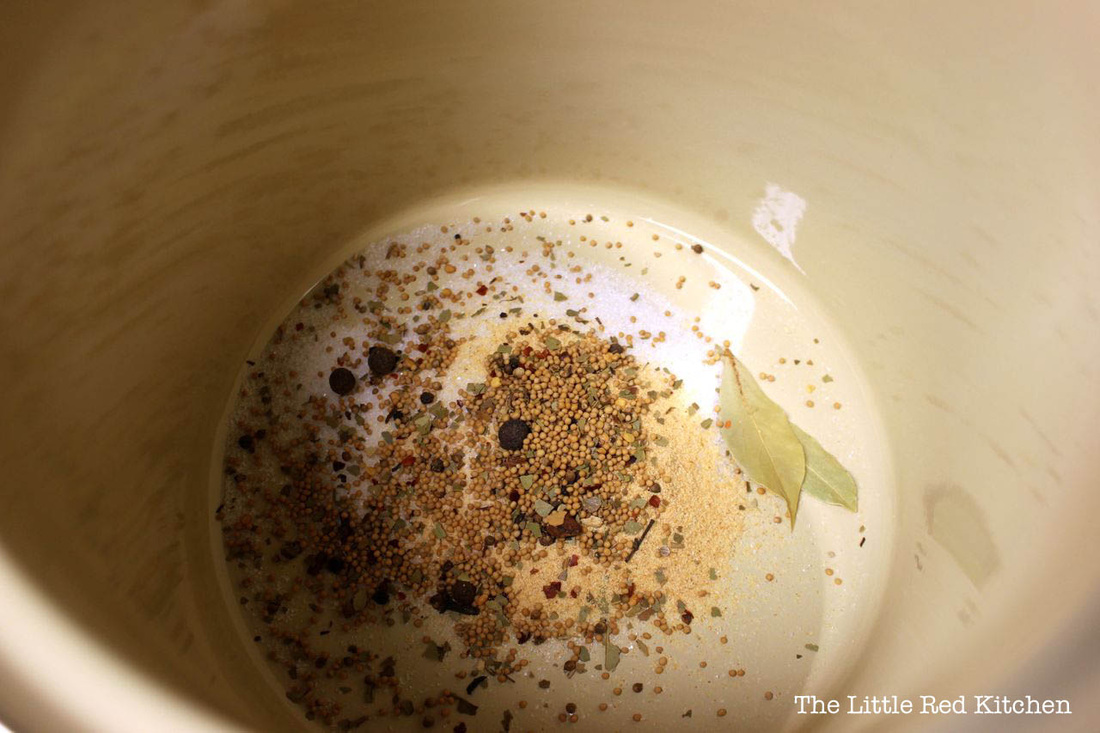
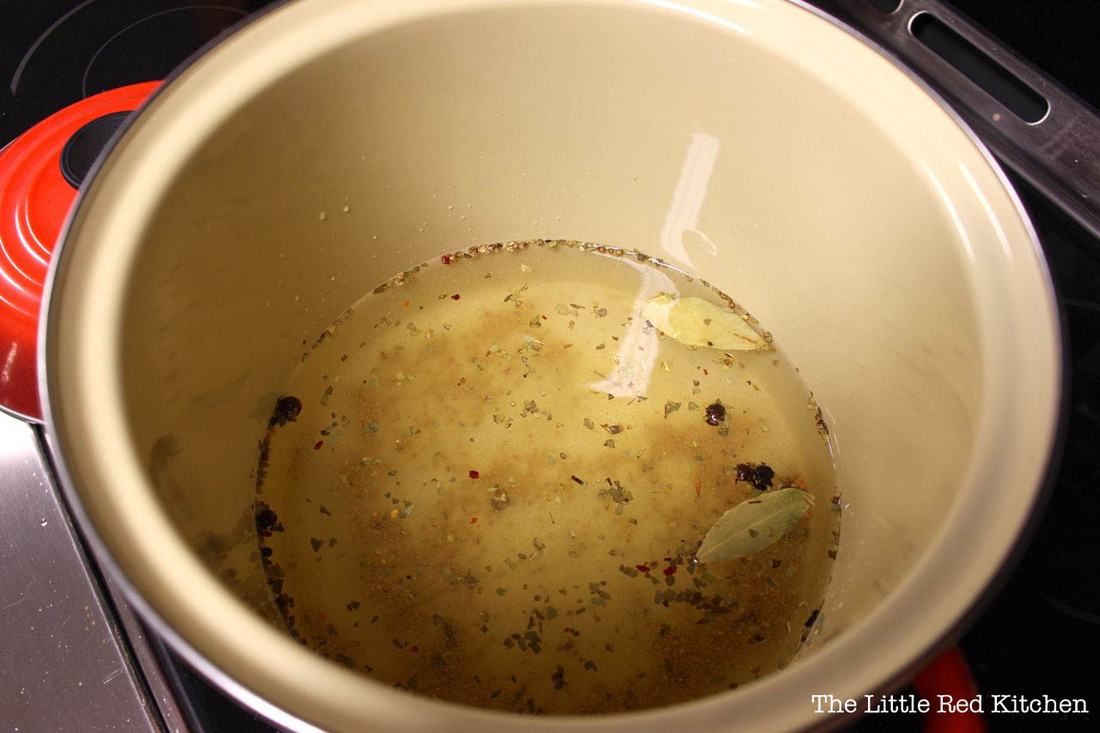
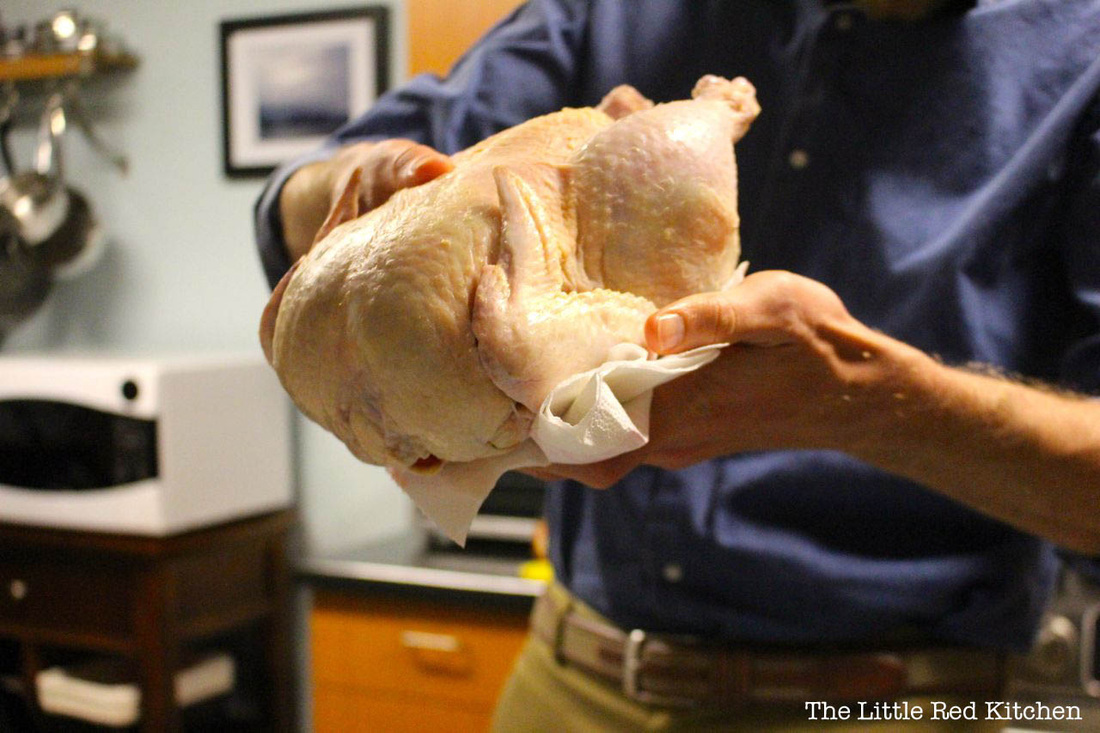
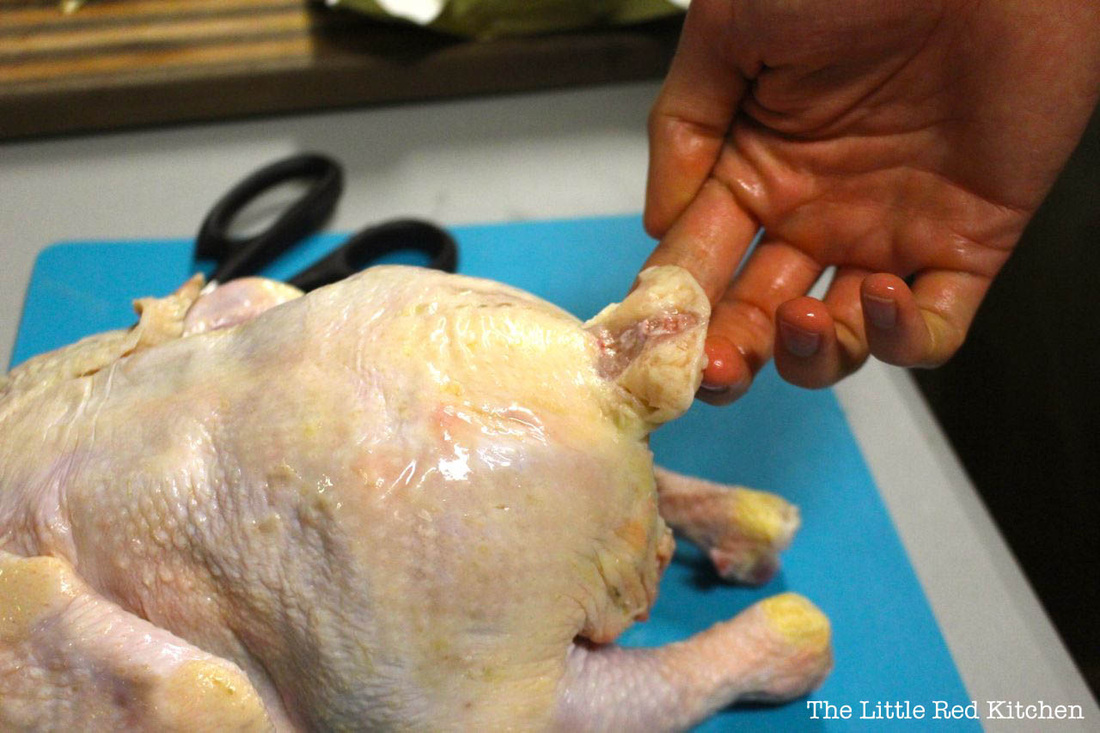
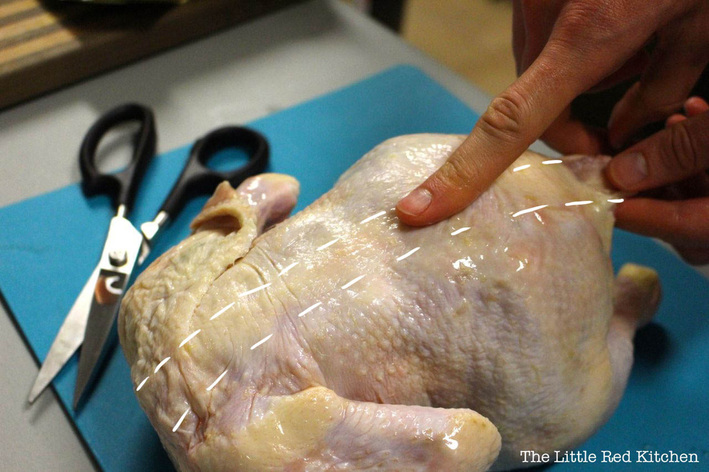
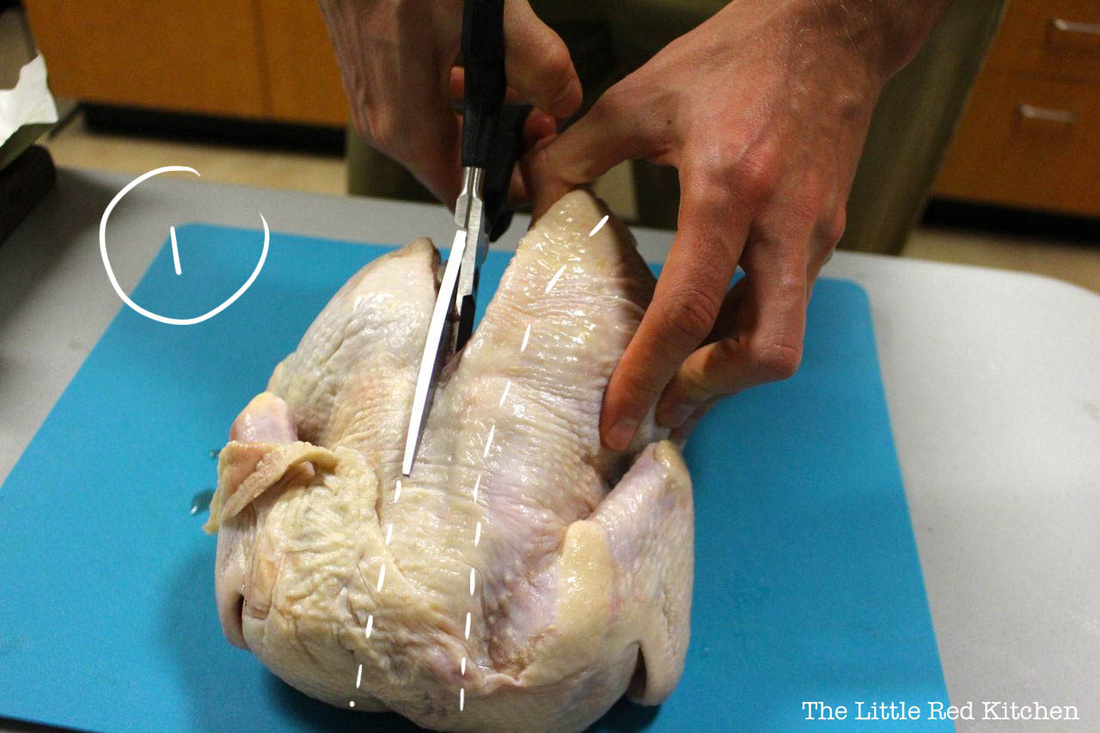
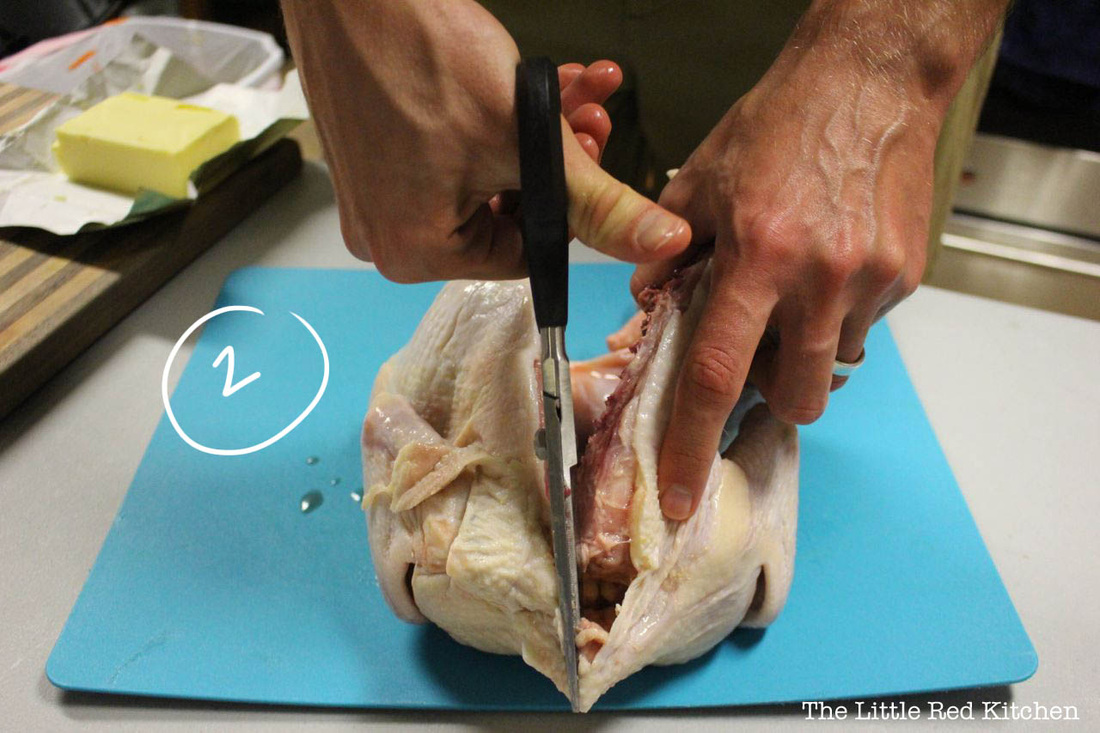
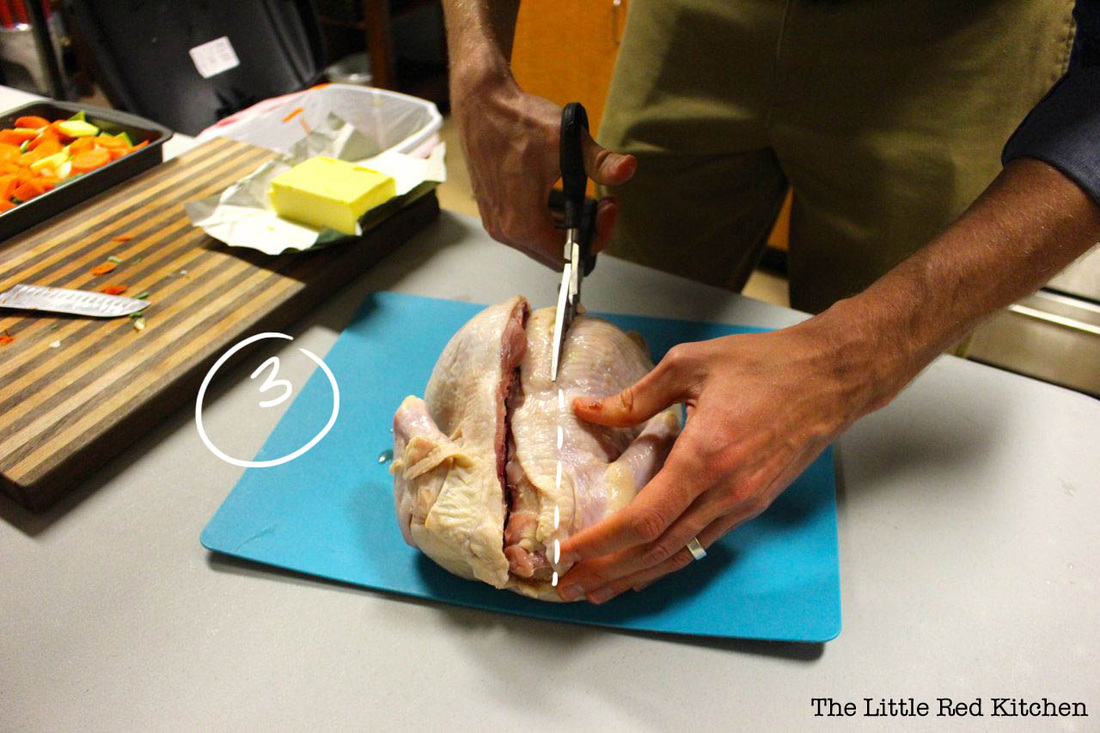
This is one of those recipes that, no matter how many times I make it, I never get sick of. Inevitably, pictures of the perfectly roasted bird end up on my Facebook pages and Instagram. I am not ashamed. Originally, I was inspired by Nom Nom Paleo's " Easiest Roast Chicken Ever*", which (if you have access to a Trader Joe's) means an amazing roast chicken dinner on the table in about an hour. Since I didn't and still don't have access to Trader Joe's (and their amazing pre-brined chickens), I had to make do on my own for the chicken-prep part. (*If you do have access to a Trader Joe's, hop on over to the site linked above. You are in for a quality recipe and some beautiful pictures.) One glance at the available recipes online (ahem, Paula Deen), and it was enough for me to steer clear of any pre-made recipe (although I'm sure there are other great ones out there). I wanted the brine to be strong enough to work in 30 minutes, but not enough that the salt or pickling spices would overpower the chicken. Keep reading to find out how I solved that problem! Ingredients 1 4-5lb chicken 1/3 (rounded) cup sea salt, or more, if you're a salt lover 1-2tbsp garlic powder 2 tbsp pickling spices 2-3 bay leaves 8 cups water 4-5 cups of tough/root vegetables of your choice (leeks, carrots, onions, potatoes), roughly chopped 2-4tbsp butter, softened First, prepare your brine. Throw all of the brine ingredients (sea salt through water, above) into a large stock pot (it will need to hold the water and your chicken), and stir well to combine. The salt will begin to dissolve as you prep the chicken. Some folks like to simmer the brine first, to ensure that all of the salt has dissolved, but I've done it both ways and never had an issue with either one. Next, you're going to need to know how to butterfly the bird. This ensures that it will cook quickly and evenly (that, plus the brine, means fully cooked white and dark meat that's still super tender). To begin, pat your bird dry ( health/microbiology note: Don't rinse first! You're significantly increasing the spread of surface bacteria around your kitchen, even if you don't see the water splash. Here's a great NPR article on this, thanks to my friend Chad.) Step 1. Lay your (now dry) bird on a cutting board (or other easy-to-clean surface, since chickens carry Salmonella spp.), breast side down. Locate the tail-- the backbone runs along the top of the chicken, starting at this point. We'll be cutting out the backbone, so the chicken will lay flat. Step 2: Take a strong, sharp pair of kitchen shears and use them to cut from the tail end (I find this the easiest way, but whichever works for you) along the backbone, all the way through. Like so:
Also: BE CAREFUL! Chicken bones are sharp and obviously this guy contains bacteria, so be sure not to cut yourself. If you do, wash your hands really well with some antibacterial soap. Probably twice.
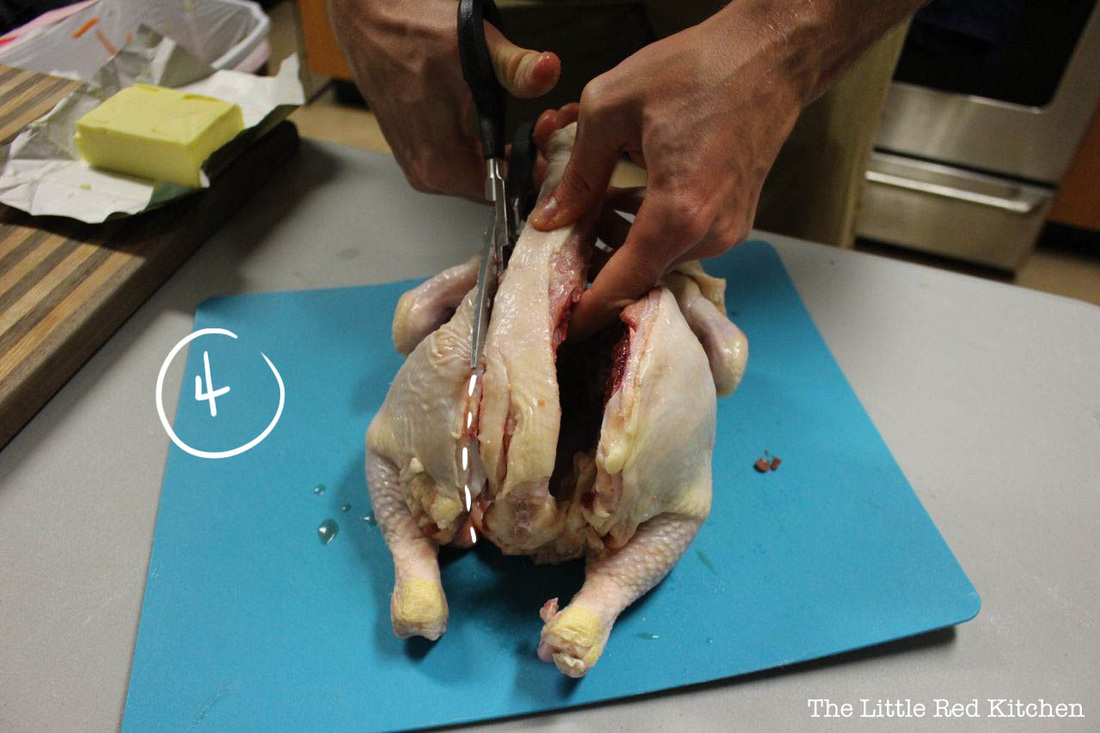
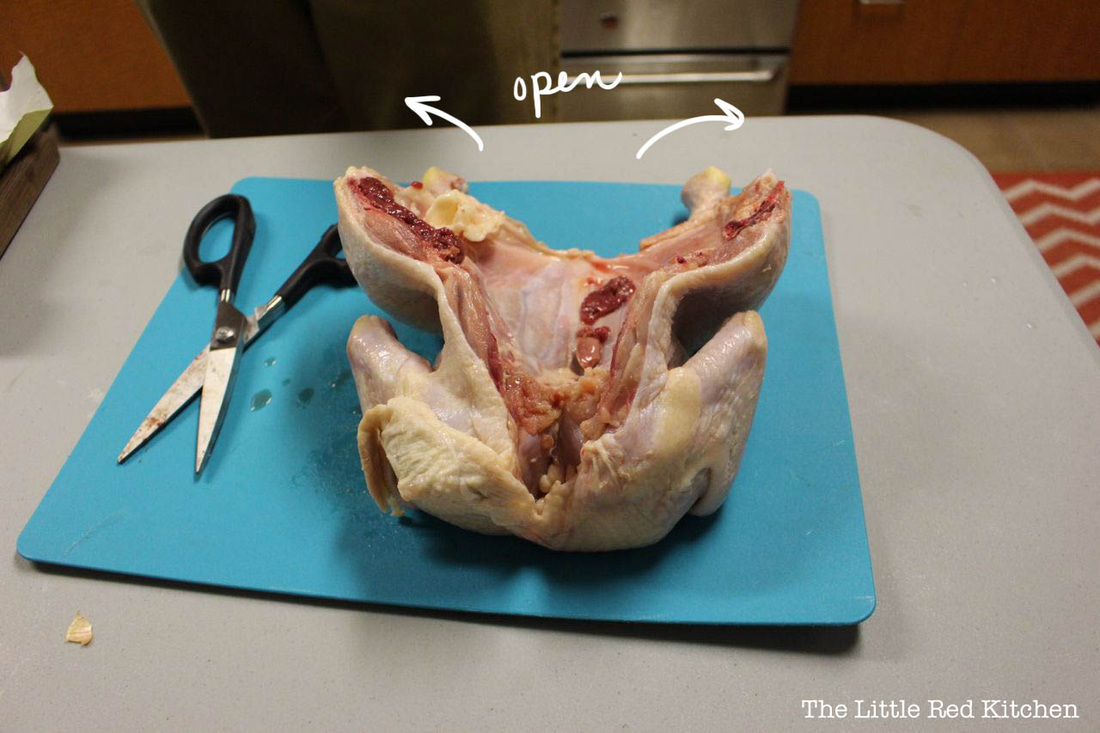
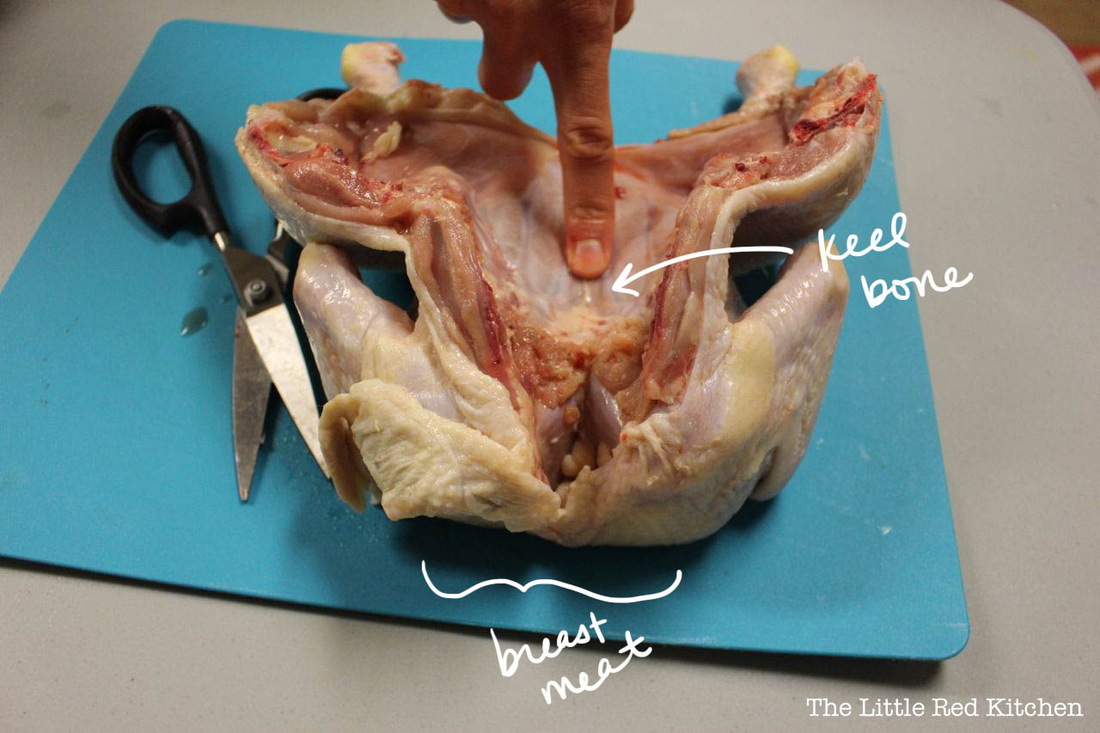
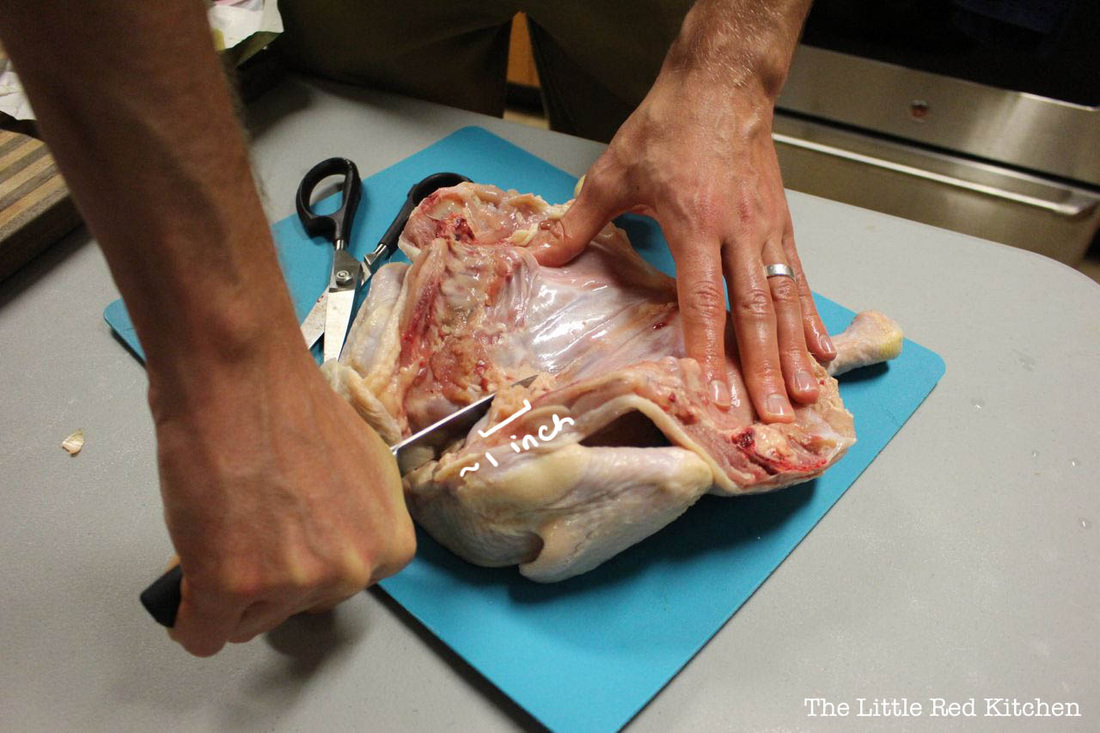
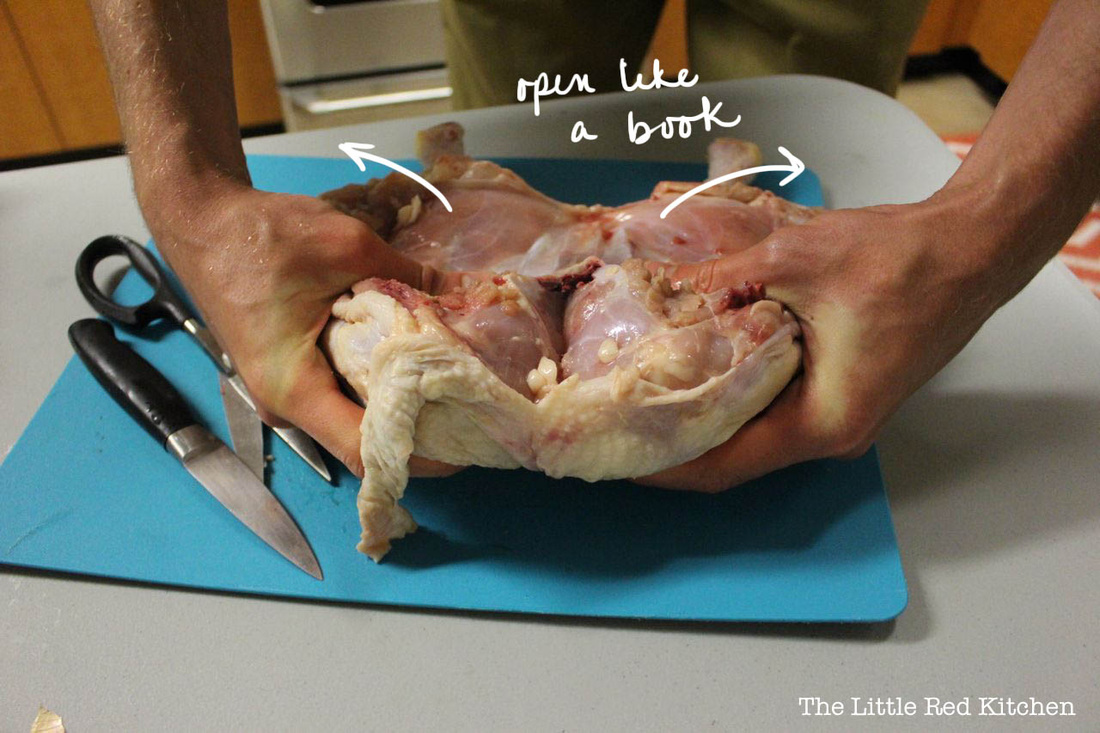
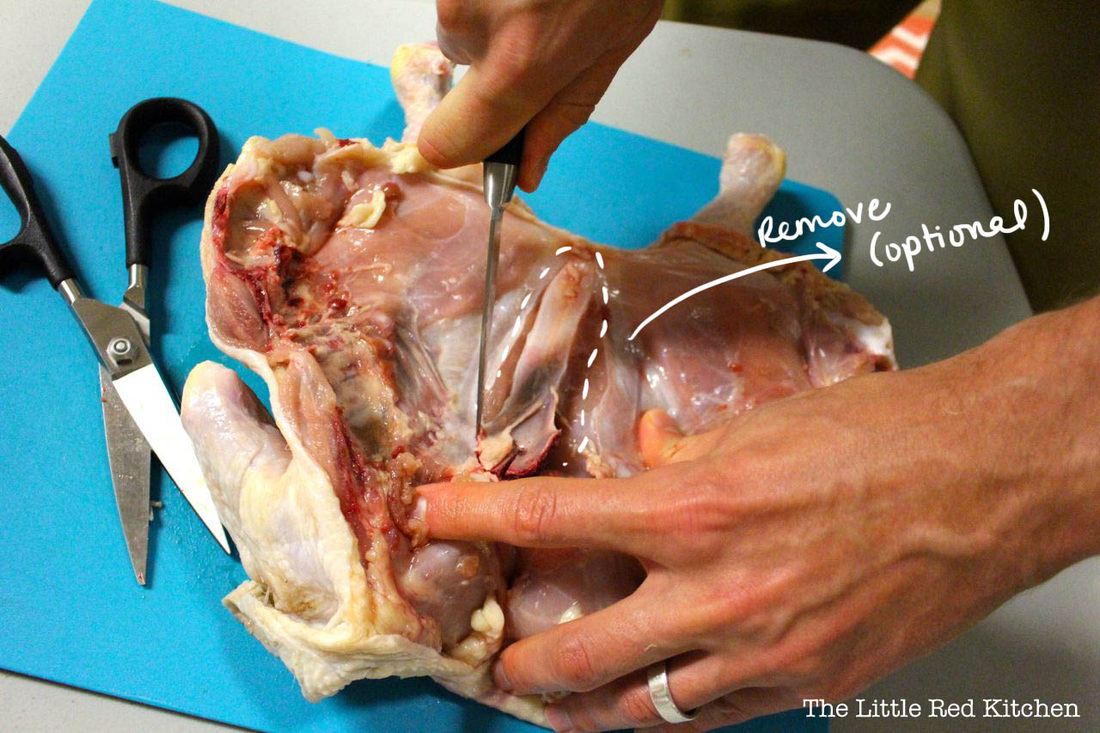
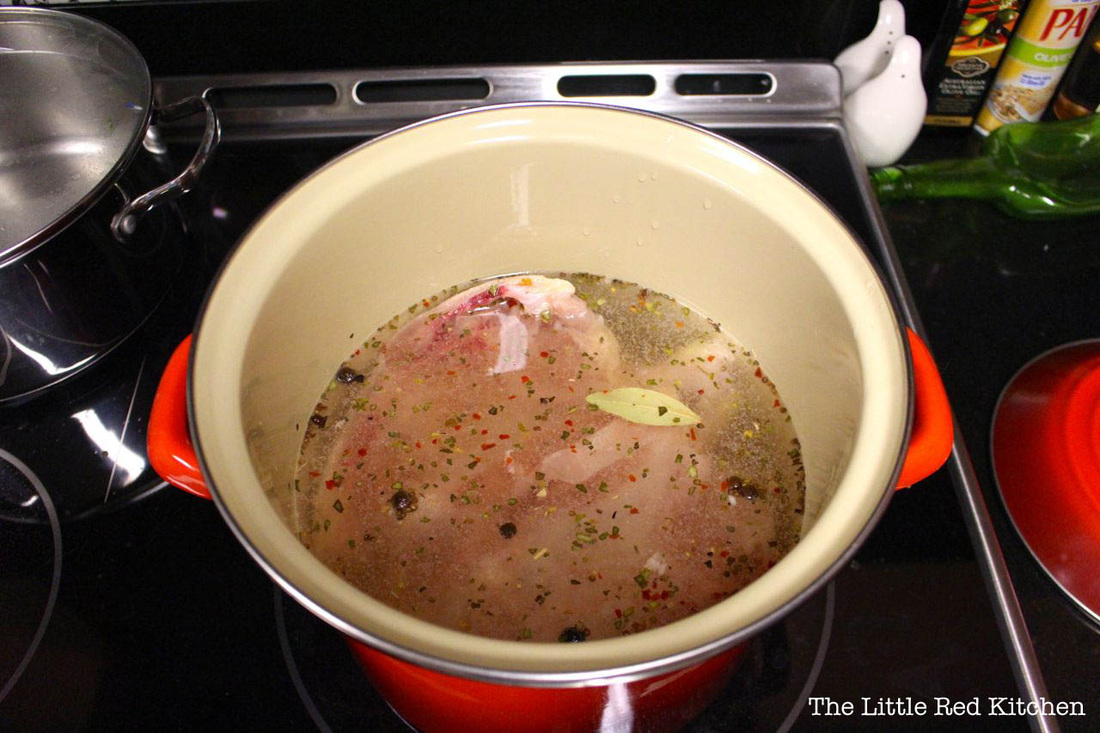
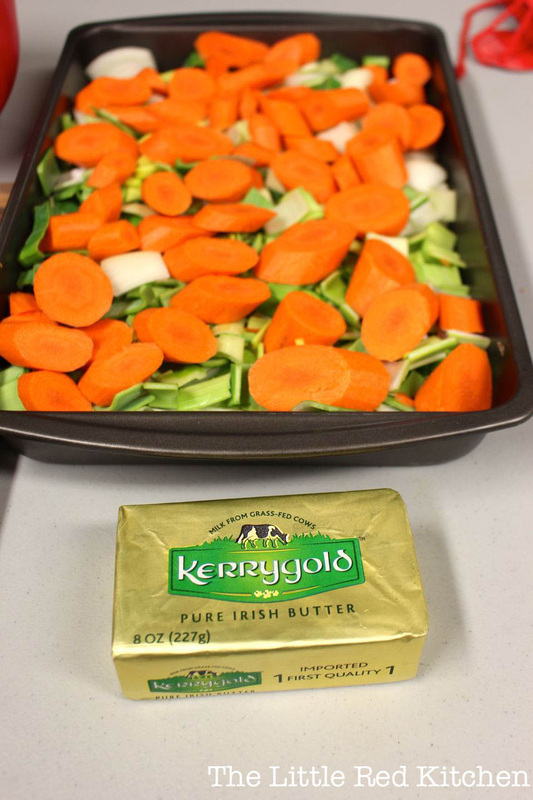
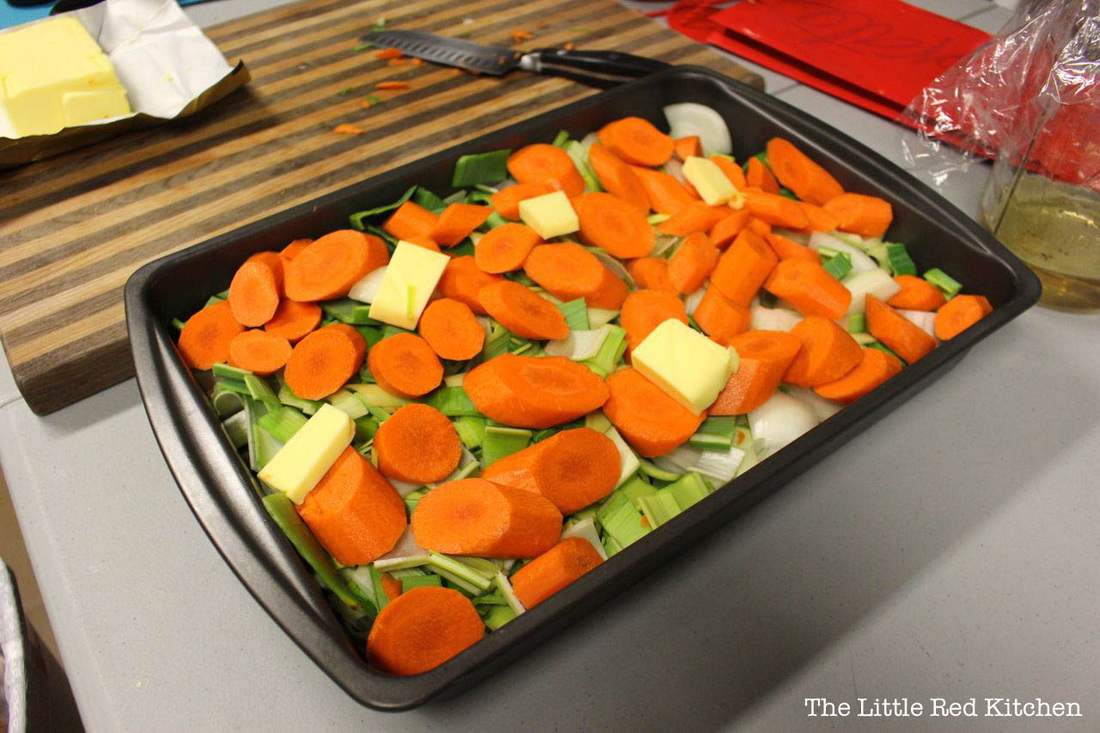
Then, repeat on the other side. Feel free to turn the chicken around to cut from the other direction, if that's easier for you (we almost always do). Once the backbone has been removed (great to save for stocks or soups, if you're into that kind of thing), the chicken should open partway, almost like a book. Step 3: Now, we want to cut the cartilage near the neck area, so the chicken will open up all of the way and lay flat. Part of what is keeping the shape of the bird is a structure called the keel bone (which, unsurprisingly, looks like the keel of a boat). Locate the keel bone, and take a sharp knife... ...which you will use to cut the top ~1 inch of cartilage, starting at the neck region. This will separate the breast meat and allow the chicken to lay flat. Step 4. Use your hands to open the chicken like a book. You may have to use a little force, as we're going to separate the cartilage in this step. Optional step: Using a sharp paring knife, carefully remove the keel bone. Some folks like to do this, and I definitely do (unless I'm feeling lazy)! This won't affect the cooking time or flavor of the chicken, but this is what you'd normally cut the breast meat off of. Without the keel bone, there are no bones keeping you from white meat bliss after this baby is done cooking! Step 5. Put your chicken in the brine at room temperature for 30-45 minutes. Step 6. While your bird is brining, preheat your oven to 425 degrees F. Then, prep and roughly chop your favorite root vegetables, and throw them into a baking pan (that will also fit your chicken). If you're feeling especially decadent, add some pats of butter to the top of the veggies (or toss with your favorite cooking oil). Kerrygold is arguably the best butter, ever. Step 7. Once the chicken has finished brining, remove it from the brine and rinse. (I know, I know... I just told you not to rinse. However, it's pretty terrible biting down on a fresh peppercorn or other pickling spice while you're trying to eat roasted chicken, so we need to do this to remove the brine 'debris'. Just be sure to clean your sink and surrounding area really well afterwards.)
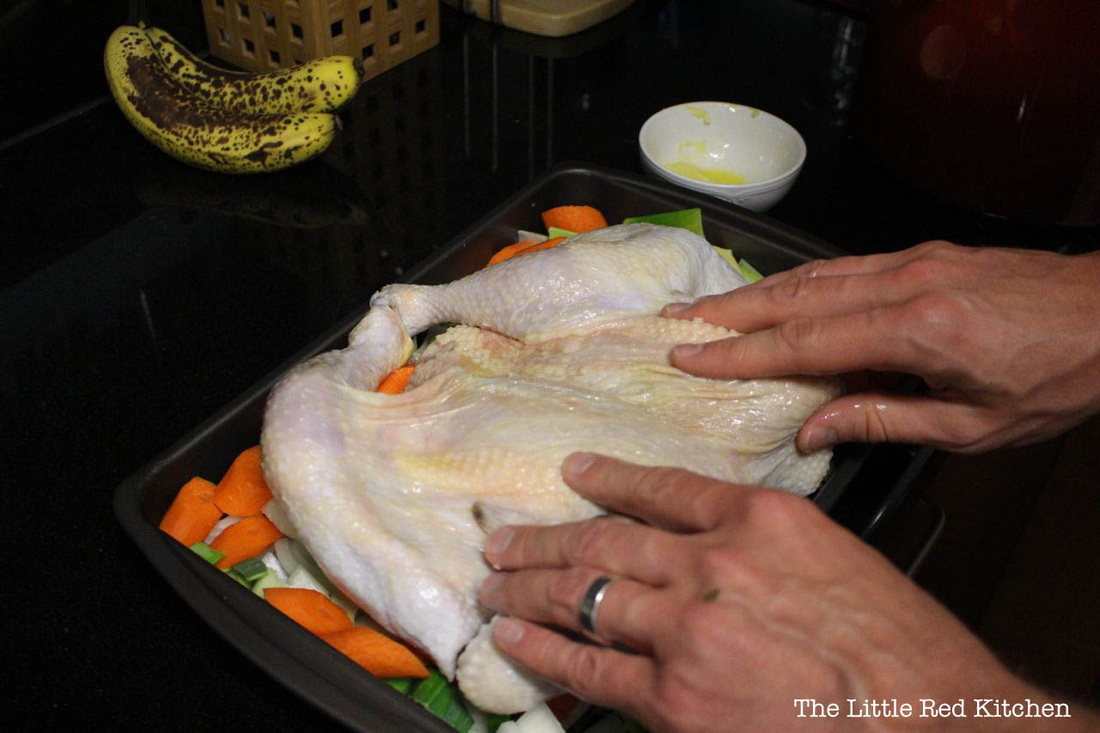
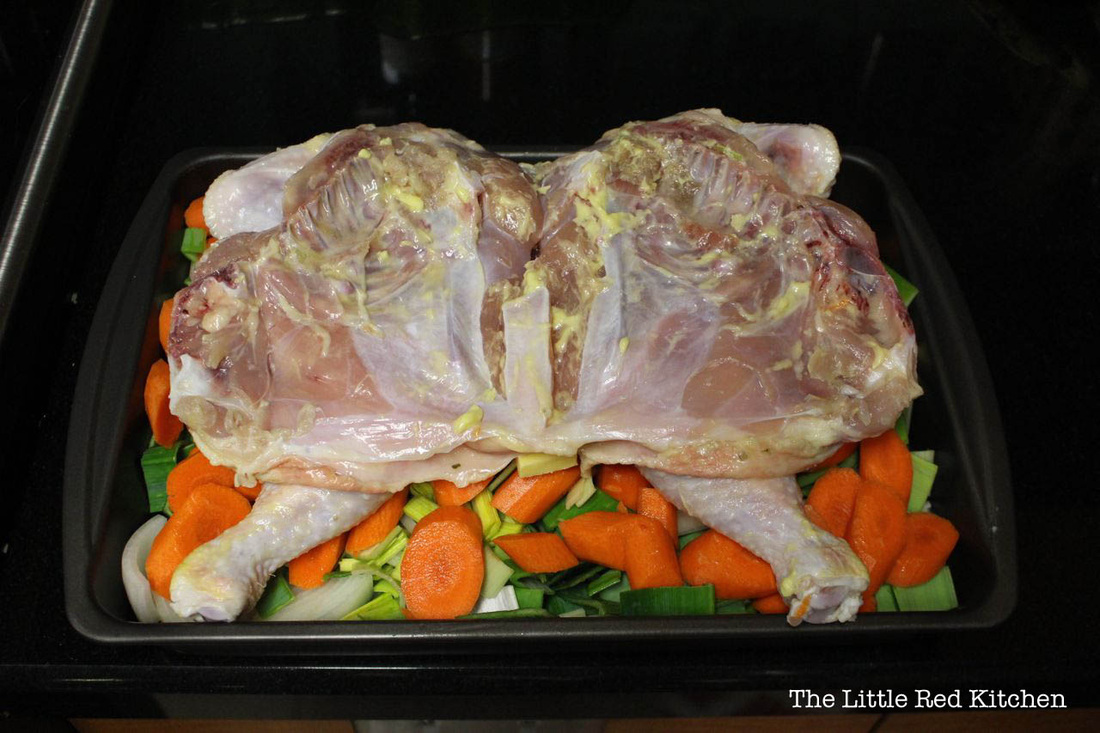
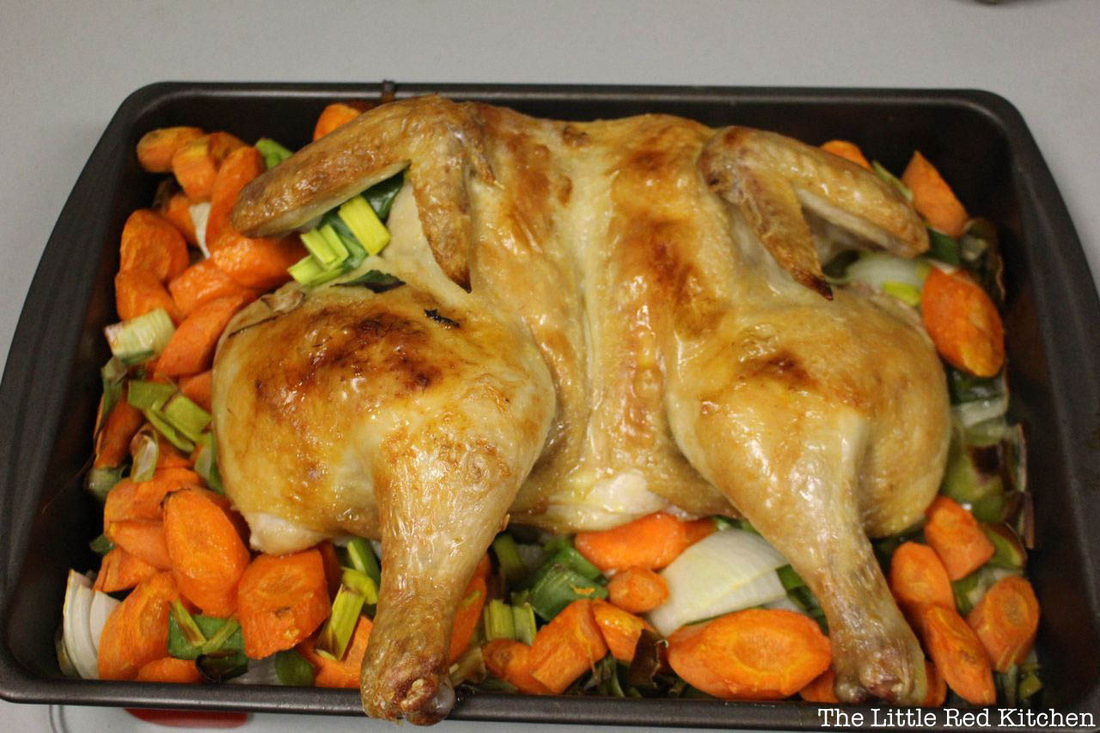
Pat the bird dry, and rub down with a generous coat of softened butter or your favorite cooking oil (both sides). Step 8. Place the chicken breast-side down on the tray of vegetables, and make sure it fits within the tray. Step 9. I like to roast butterflied chicken as follows:
45 minutes, breast side down
15 minutes, breast side up (It's helpful to use tongs for the flipping step.)
broil, 2-5 minutes, breast side up
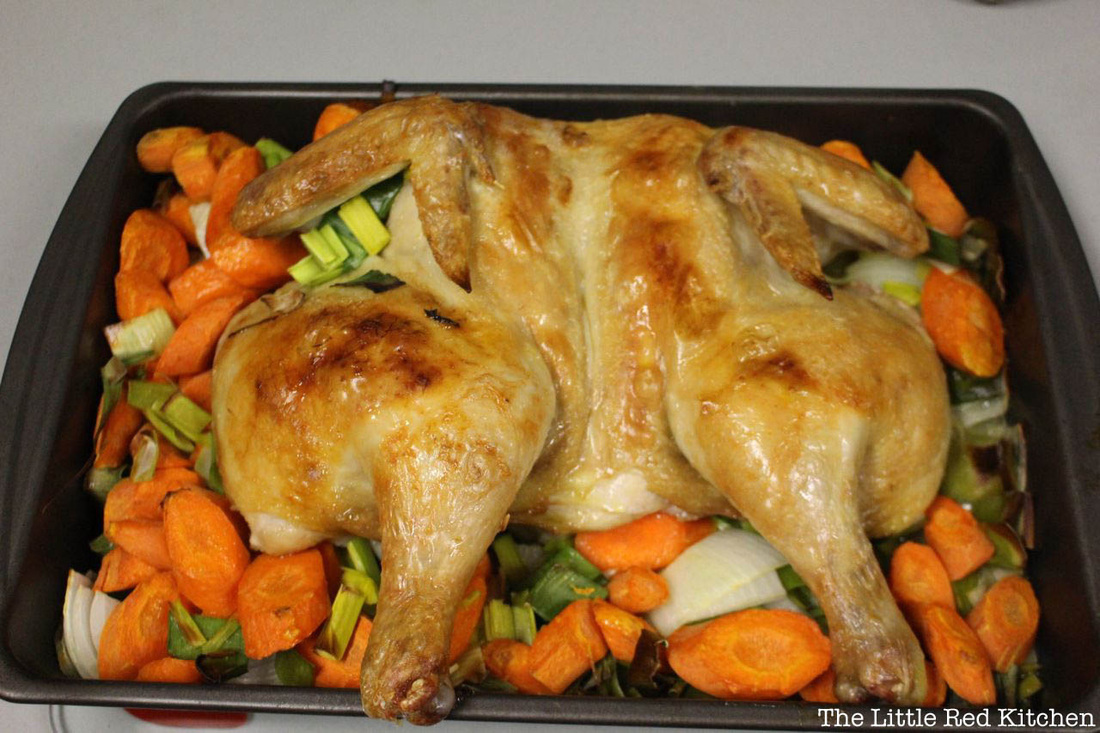
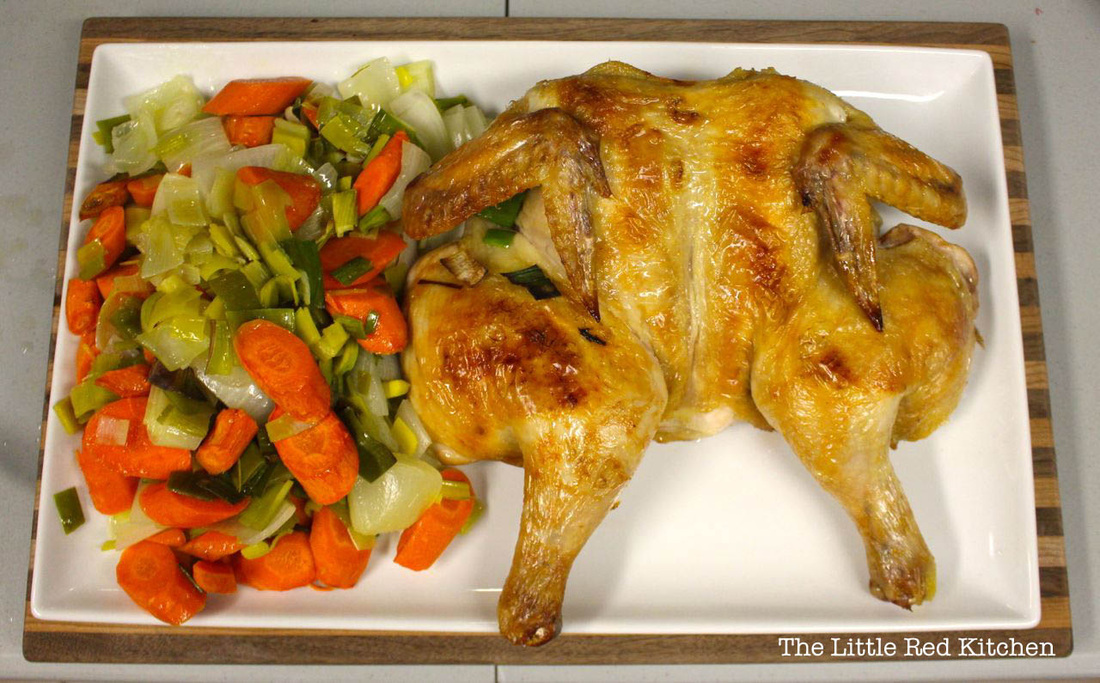
...What you end up with is tender, juicy chicken, with a crunchy, golden skin on top...
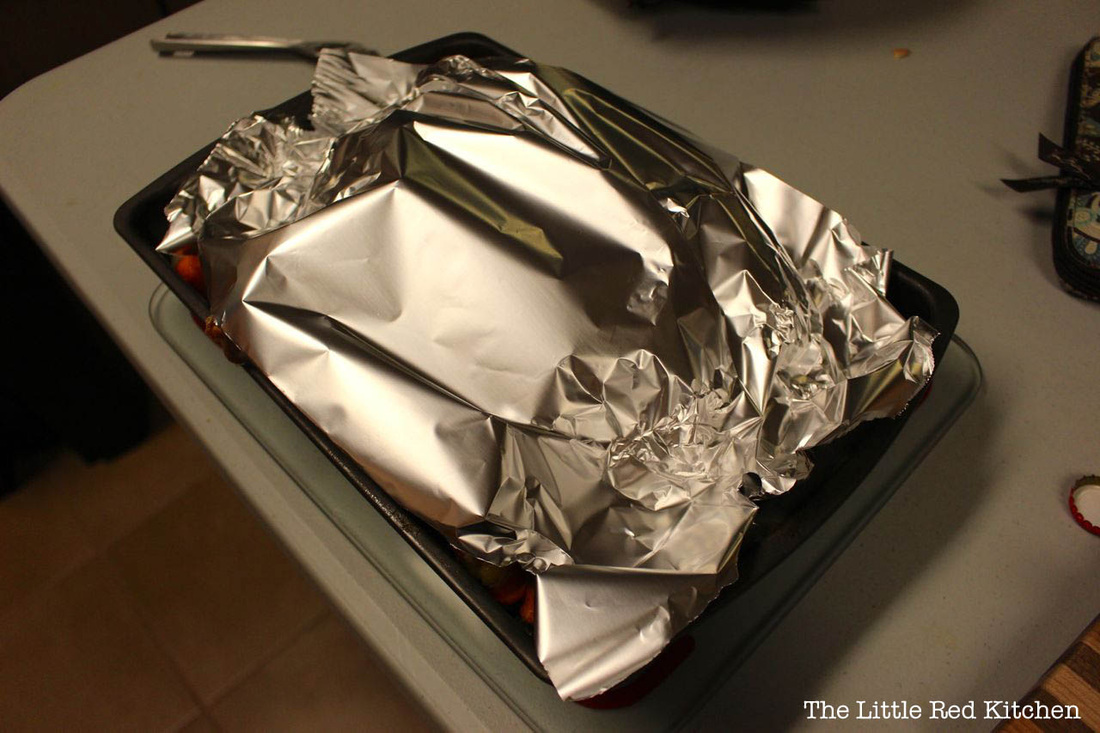
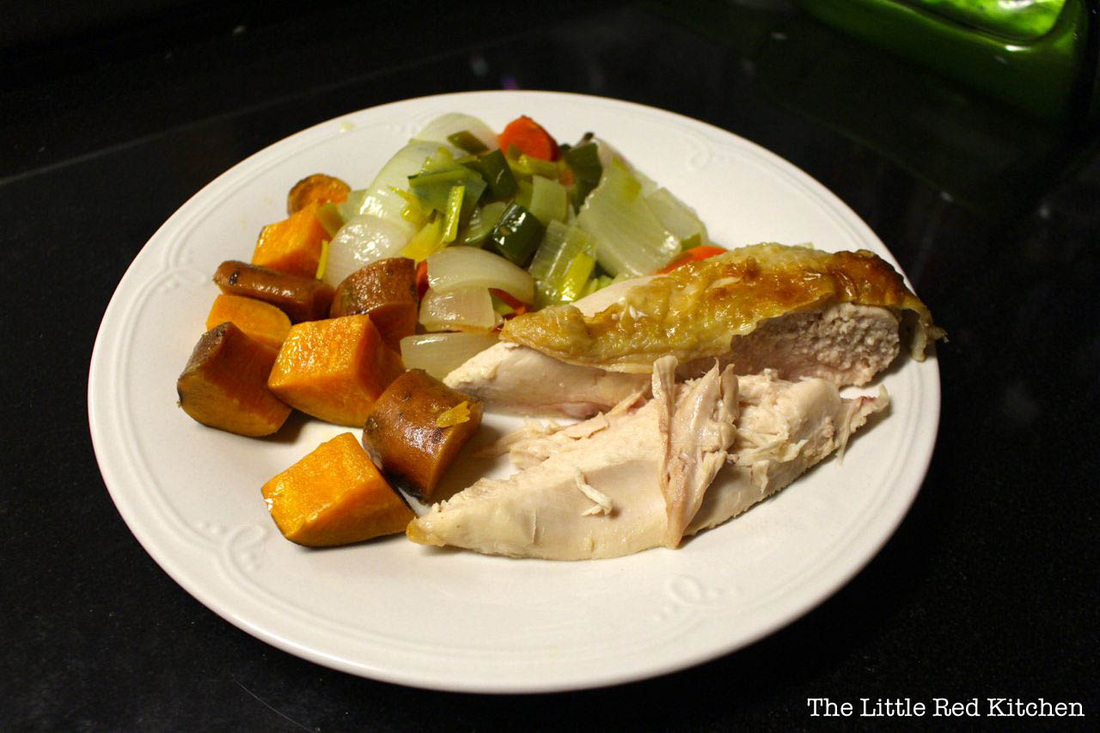
Like this! Step 10. Tent the chicken in tinfoil for 15-20 minutes. Step 11. Then serve up alongside the vegetables you just roasted under the chicken! Delicious. Here's what my dinner plate looked like: Enjoy, and thanks for reading!
- Kaitlin
You know what they say about invention being the product of necessity? Well, I had a pound of ground beef, and some sorry-looking vegetables that were on their way out the door. Something told me that a meatloaf was in order!
Meatloaf can be wonderful, homey, comfort food that you just dig into and feel satisfied beyond words after eating.
Or, it can be dry, bland (or overly seasoned), chewy, tough, and about a dozen other unappealing adjectives. I tried to solve all of these issues with my recipe and I think I did a pretty good job! You will have to make it to see for yourself.
Ingredients:
Meatloaf:
1 lb ground beef (80/20 is preferable, but definitely no leaner than 85/15)
1 large carrot, diced fine
1 large rib of celery, diced fine
1 medium onion, diced, you guessed it, fine (Yellow or red is fine)
1 clove of garlic, minced
1 tsp dried thyme
1 piece of white sandwich bread, crusts removed
1/4 cup milk
1 large egg
1 tbsp. Worcestershire sauce
1 tsp Dijon mustard
1 tsp tomato paste
1/2 cup panko breadcrumbs
1 tsp oil
1 tsp butter
salt and papper
Glaze:
1/4 cup plus 2 tbsp. ketchup
1.5 tbsp. cider vinegar
1/4 tsp salt
1 tbsp. brown sugar
pinch of cayenne pepper
**I know these ingredient lists look long, but if you actually take a look at what's on them, it's almost all things that you have on hand already.
Because I know the importance and value of leftover meatloaf, I will tell you that this recipe makes enough for 2 with leftovers, or enough for 3 or 4 without. It's a little guy; hence, the little red meatloaf! I'd wager that you could easily double this recipe, but you may have to adjust your cooking times.
Step 1:
Pre-heat the oven to 350 degrees. Line a rimmed baking sheet with parchment paper.
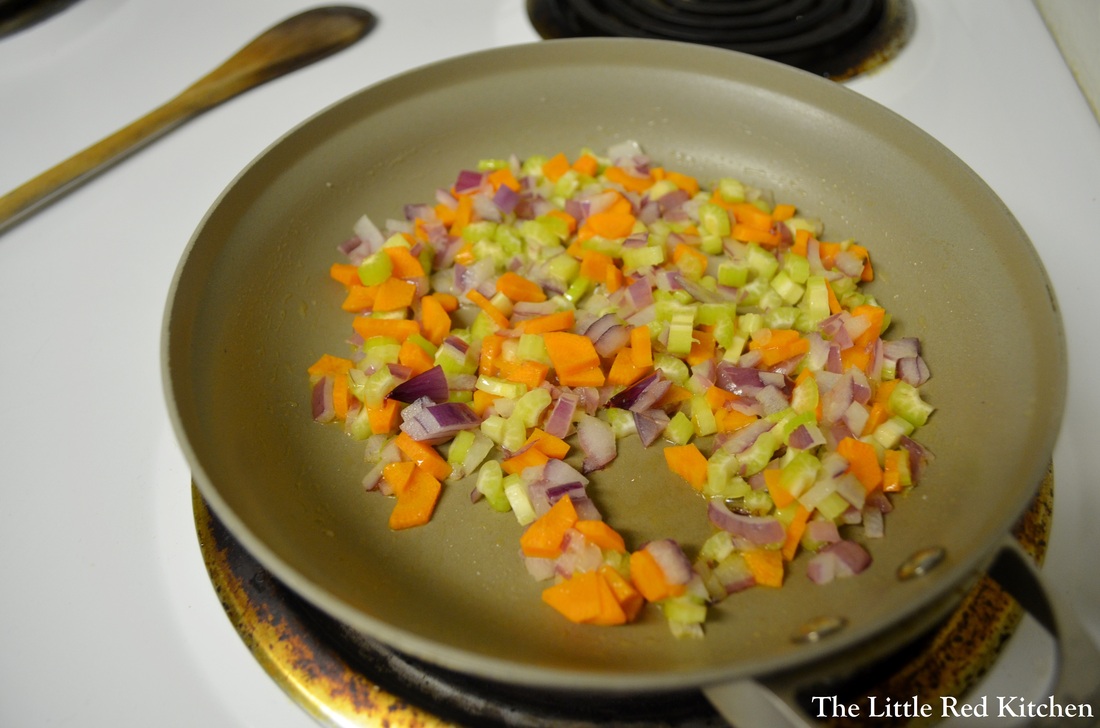
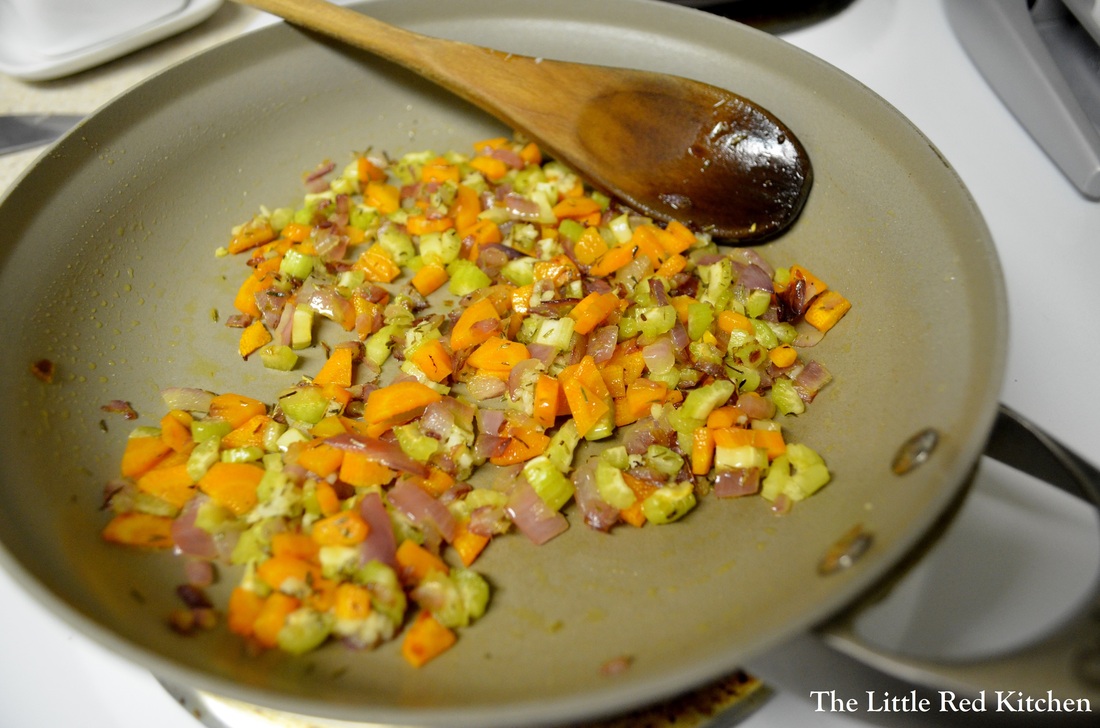
Melt the butter and oil together over medium-low heat, then sauté the carrot, onion, and celery with a tsp of salt for 6-7 seven minutes, until they are softened and translucent. We're not looking to brown here.
Then add the garlic and thyme and cook for 30 seconds, until fragrant. Remove from the heat and set aside. Step 2:
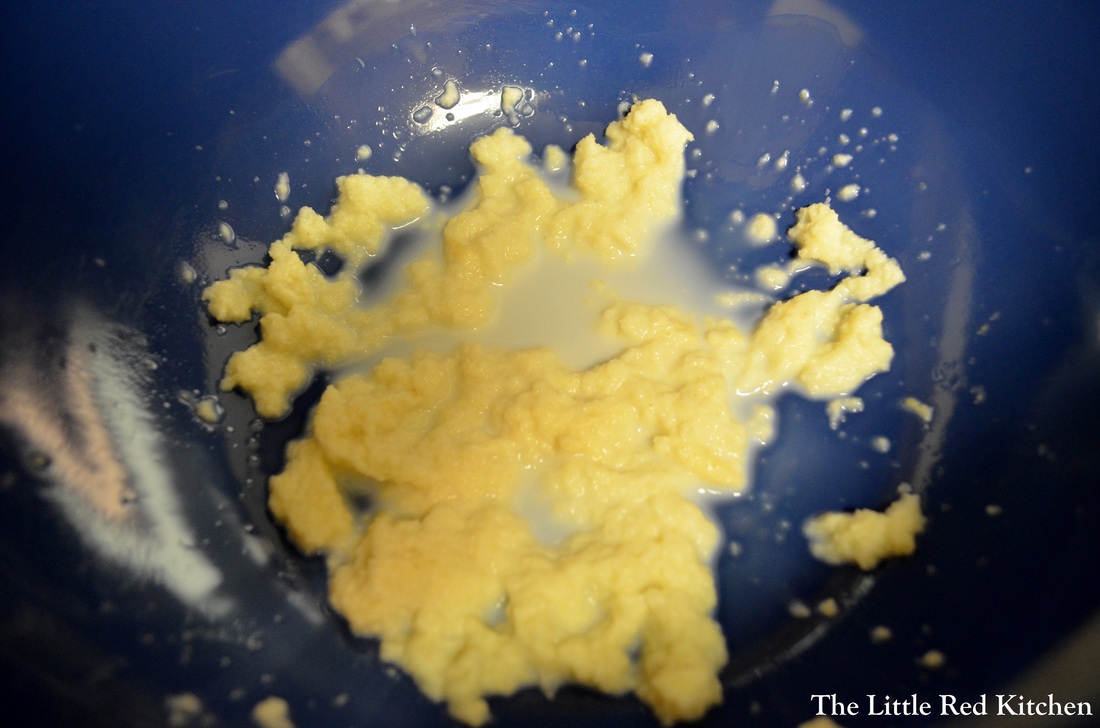
Put the piece of bread in a large bowl and pour the milk over it. Mash this up with a spoon or fork. Looks gross and unnecessary, doesn't it? Well, this mixture is called a panade, and as that milk-soaked bread distributes throughout the meatloaf, it's going to ensure that it stays moist. It's just as effective in meatballs too!
To this bowl, add the egg, Worcestershire, tomato paste, Dijon mustard, 1/2 tsp salt and 1/2 tsp pepper. Stir to combine.
Step 3:
Add the vegetables from the pan to the bowl, followed by the ground beef and the breadcrumbs. This is where you want to mix the meatloaf together, preferably with your hands. It's pretty critical that you are gentle in this process. Don't compact the meat or overwork it; this is what produces that tough, chewy loaf in the end product. Instead you want to use your fingers to mix until everything is just combined.
Step 4:
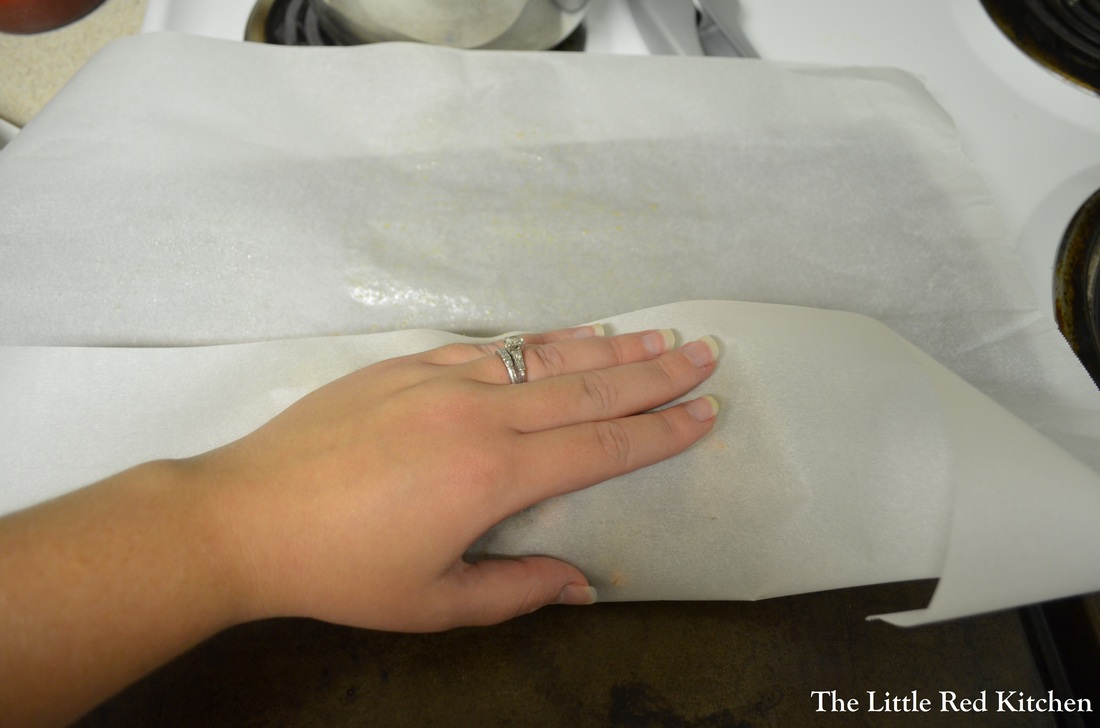
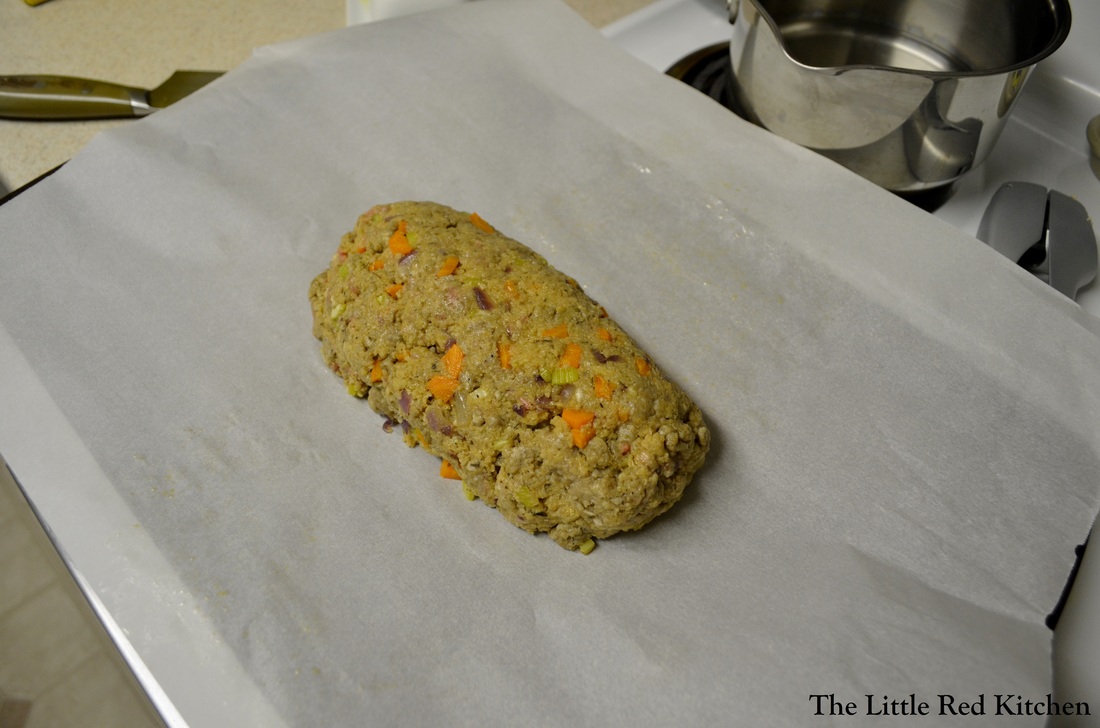
Turn the mixture out onto the parchment, and shape into a loaf. This is where the parchment comes in handy. Bring the sides of the parchment up and use them to gently press the meat into the shape you want. Bake for 20 minutes at 350, then turn the oven up to 400 degrees and cook for an additional 15 minutes, or until the meat registers about 140 degrees, if you have an instaread thermometer (which I recommend having in your kitchen!). Step 5:
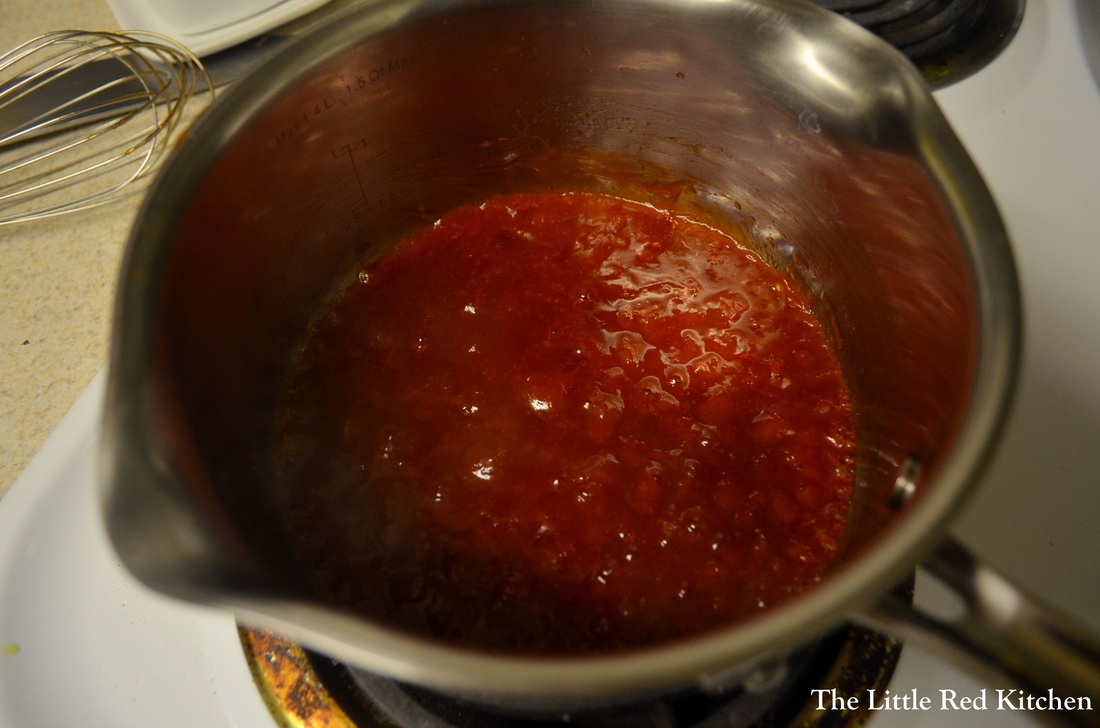
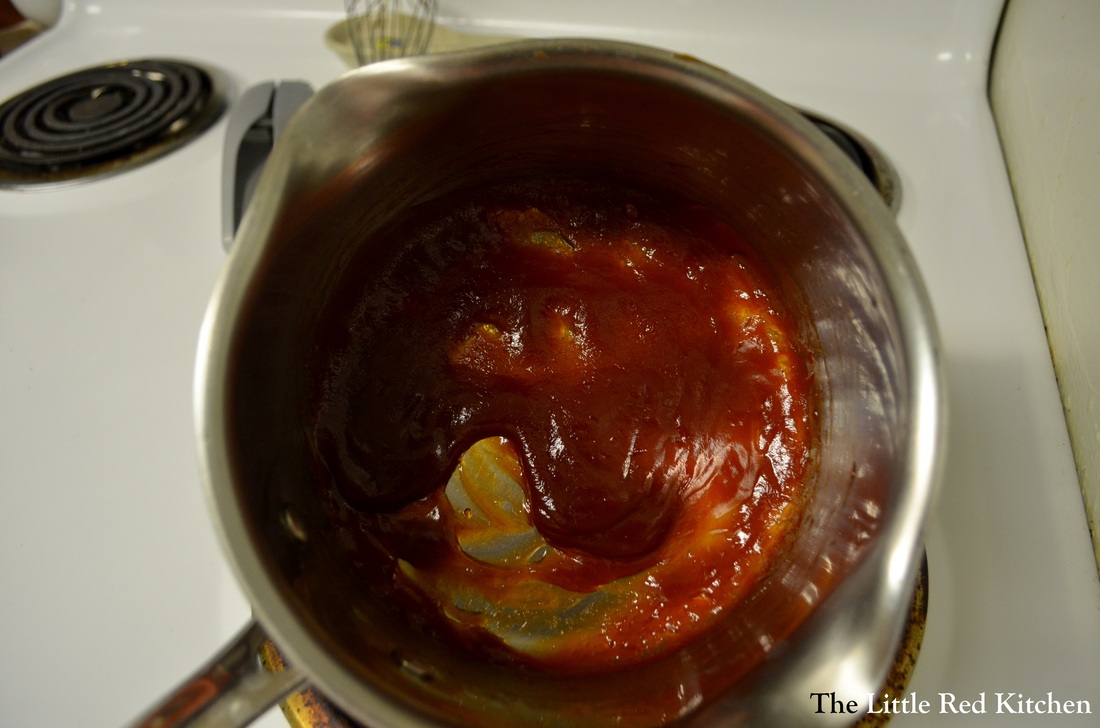
While the meat is cooking, you want to prepare the glaze, which is super easy. Simply add all of the glaze ingredients into a small saucepan and whisk to combine. Bring to a simmer, then reduce the heat to medium-low and simmer for 10 minutes, until the mixture has darkened, and thickened. A good trick is to hold the pan upright, and if the glaze doesn't slide down the bottom but clings to it, you are there. Step 6:
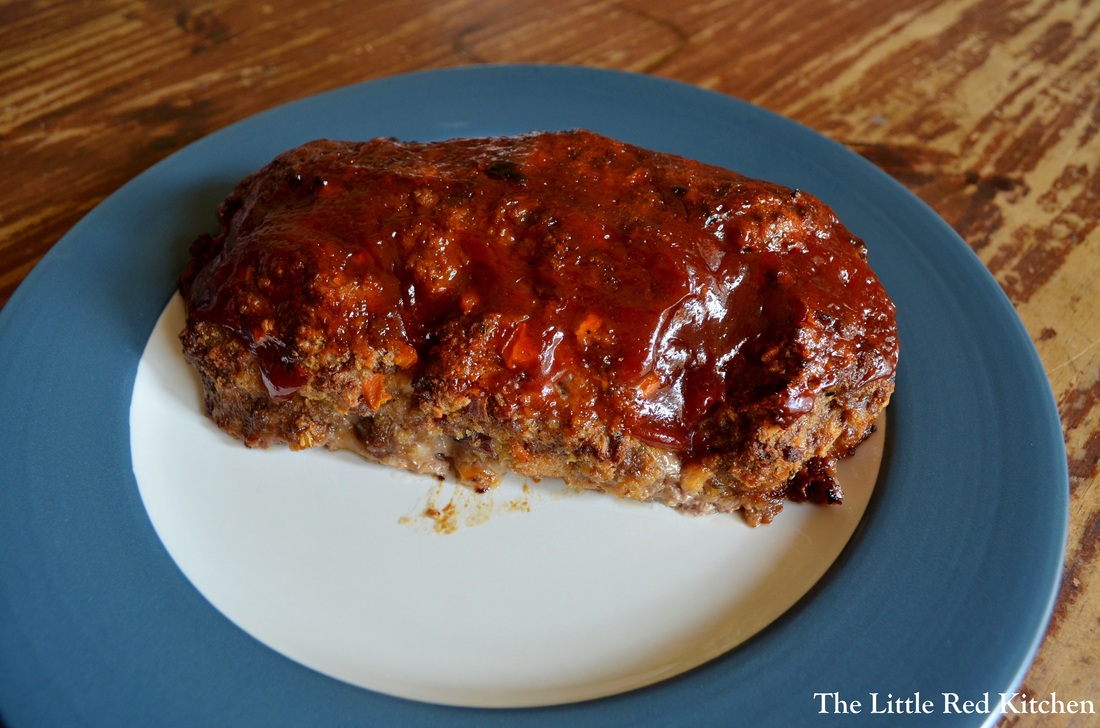
Just set the glaze aside, and once the meatloaf has cooked for those initial increments at 350 and 400, pull it out and paint the top and sides of the meatloaf with the glaze. Then crank the broiler on and bake for about 3 minutes, until the glaze has darkened even more and formed a tantalizingly sticky exterior.
Pull the meatloaf out and let it rest for 5 to 10 minutes before digging in! This meatloaf has great beefy flavor, with subtle kicks of the Dijon, Worcestershire, garlic, and veggies in the background. The glaze adds a great tangy, sweet contrast, and actually if you don't feel like making it yourself, substitute your favorite barbeque sauce. Or even just ketchup and brown sugar would work fine. Just serve it up with mashed potatoes and a nice glass of wine, and I don't think comfort food gets more comforting than that.
~Lauren
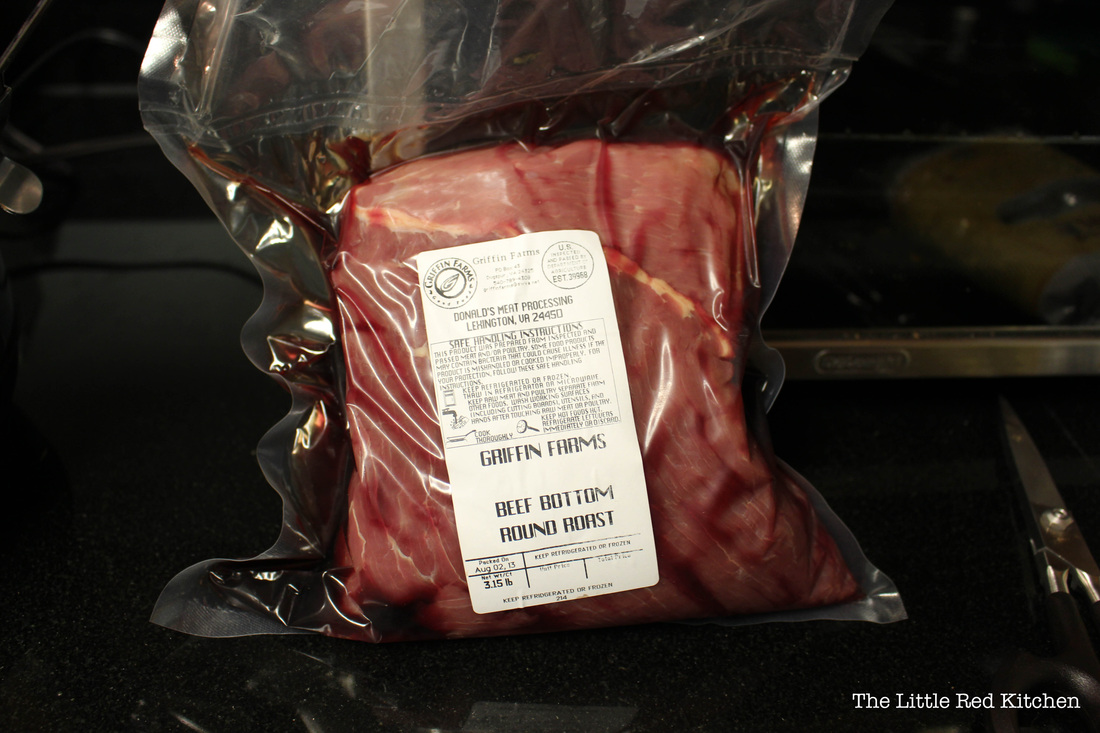
We all seem to be leading busier and busier lives these days, and we often hear that as a reason for not cooking at home, eating healthy, etc. This is the kind of recipe that you can throw together quickly before work, without much thought, and come home to a) your house smelling amazing and b) a delicious, home-cooked meal! If you don't already own a crock-pot/slow cooker (depending on where you're from), I'd highly highly recommend it! I own this set-and-forget model, reminiscent of a space ship, but you can't go wrong with a more basic one, too. The 10-minutes in the title of this post obviously refers to the actual hands-on time, while the cooking time will vary from 8 to 9 hours. The recipe changes depending on what I have in the house at the time, so I've added some variations below to get you started (the abbreviated recipe can be found at the end of the post)! Step 1: Acquire some form of beef roast. It should be about 3-4 pounds and will feed two people over multiple, multiple meals after we get done with it. I picked up this gorgeous, local, 100% grass-fed bottom round roast from Griffin Farms (who will be featured in an upcoming "Adventures" post, so stay tuned!). Did you know? Cuts of beef labeled "round" or "sirloin" are the leanest (least fatty). I've found that they're great for slow-cooking recipes because their toughness is reduced/completely removed by the long cooking time. Step 2: Place your roast in the crock pot. Since this bad-boy is organic and grass-fed, I'm happy keeping the juices (seen in the bag) in with the rest of the roast.
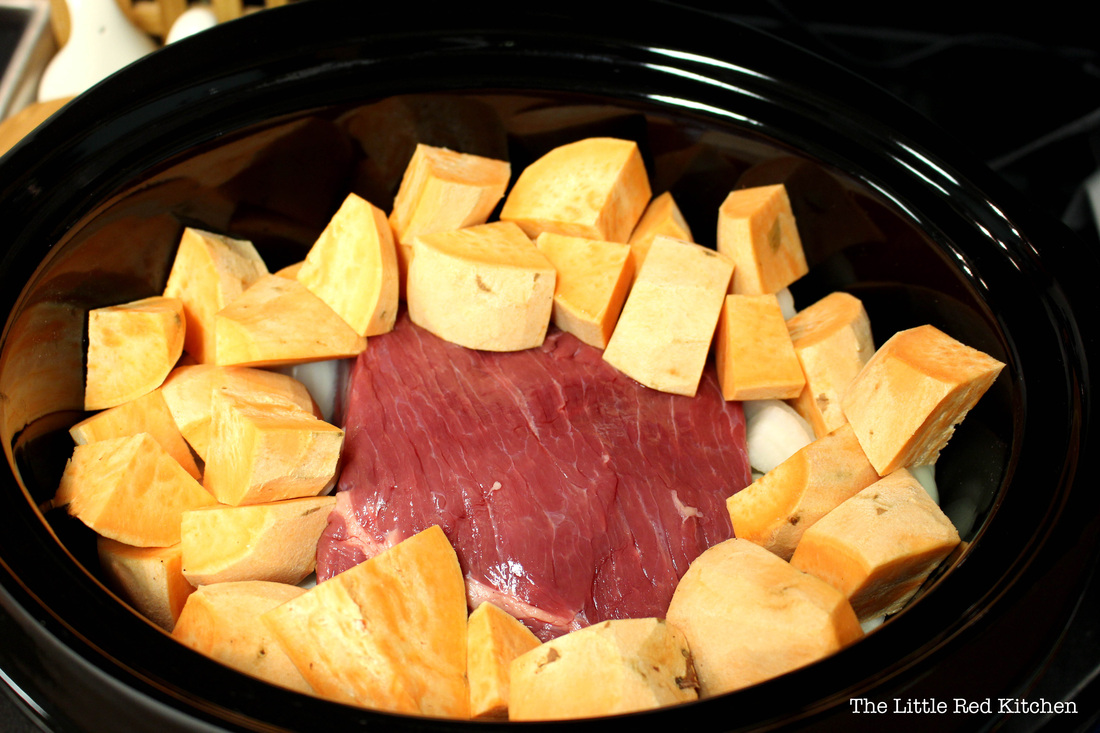
Step 3: Prepare your veggies. This will mean scrubbing, peeling, and rough-chopping. Larger chunks of vegetables will maintain their shape throughout the cooking process.
In the past, I've used carrots, celery, white potatoes, etc. This time, the only things I had available were sweet potatoes and yellow onions (two staples in our house). You can really use any root vegetable you like, or a tougher vegetable that can withstand the longer cooking time without turning to goo (yay, appetizing).
Step 4: Pack in the veggies. Place them around the roast in the crock pot, but not too tightly. Be sure to leave most of the top of the roast exposed so that we can season it.
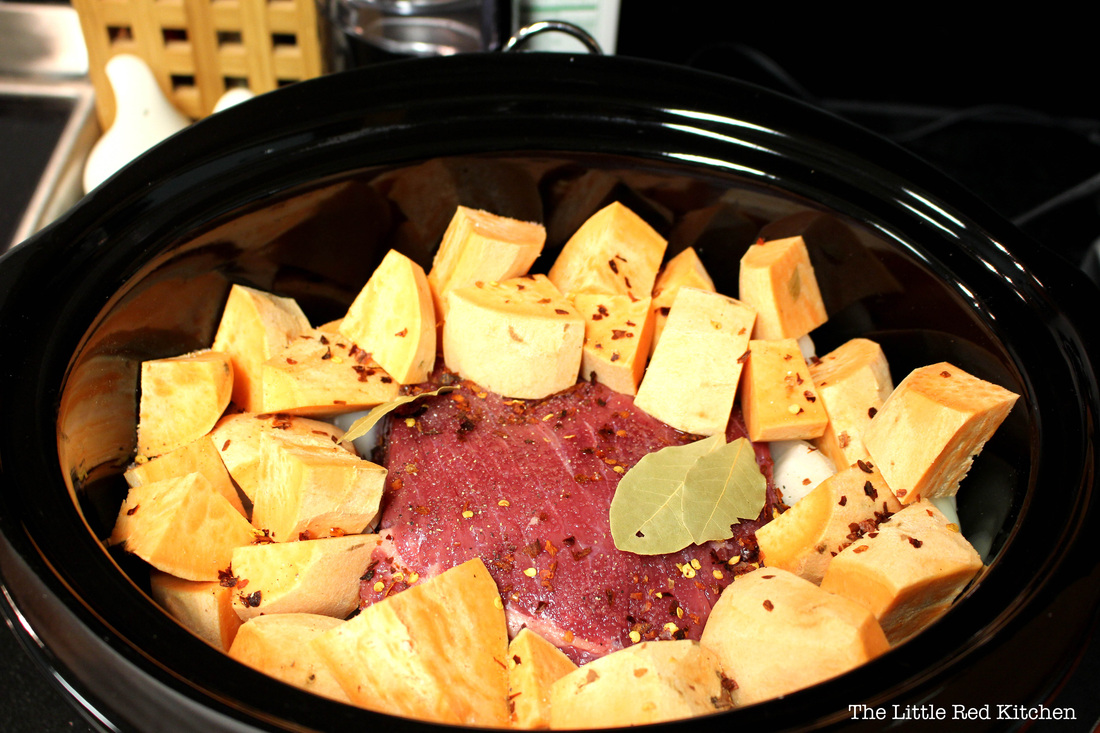
Step 5: Season it all up.
This, too, will vary depending on my mood, the time of year, etc. This time, I used kosher salt (2 tsp), black pepper (1/2 tsp), garlic powder (1 tbsp), and bay leaves (2-3). I also decided to add a little kick with crushed red pepper flakes (1/2 tsp), to help offset the sweetness of the sweet potato.
Did you know? Sweet potatoes, in addition to the traditional Thanksgiving casserole, can also be used to make savory dishes. More on that soon, too.
Step 6: Add some liquid.
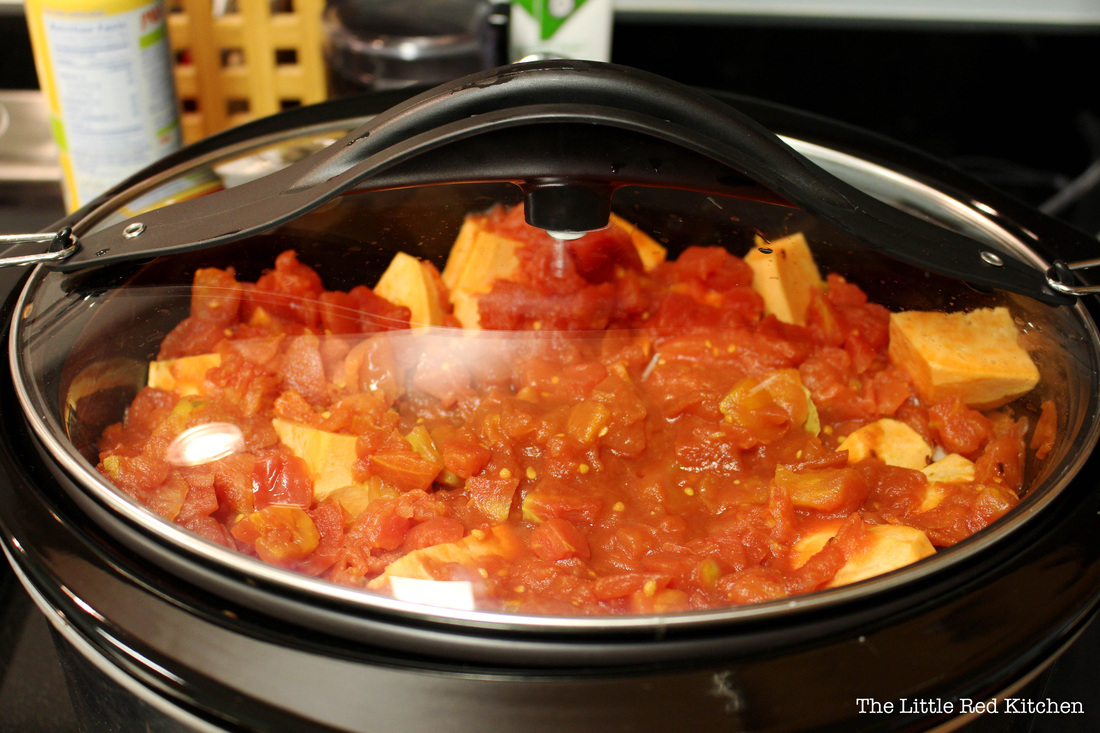
I've used everything from beef stock, to chicken stock, to wine in the past. This time, I decided that I wanted a more stew-like meal, so I added a large can of Hunt's diced tomatoes on top of everything. Then, I filled the can about halfway with water, and added that in too. Step 7: Set it and walk away.
This roast cooked for 8 hours on "low"-- if you use a larger roast, you'll need to cook it for 8-10 hours (or until the meat shreds easily with a fork.) If you have a traditional crock pot, you'll need to make sure that you're home to turn it off at the end of those 8 hours. If you have one like mine, you can trust it to turn off for you.
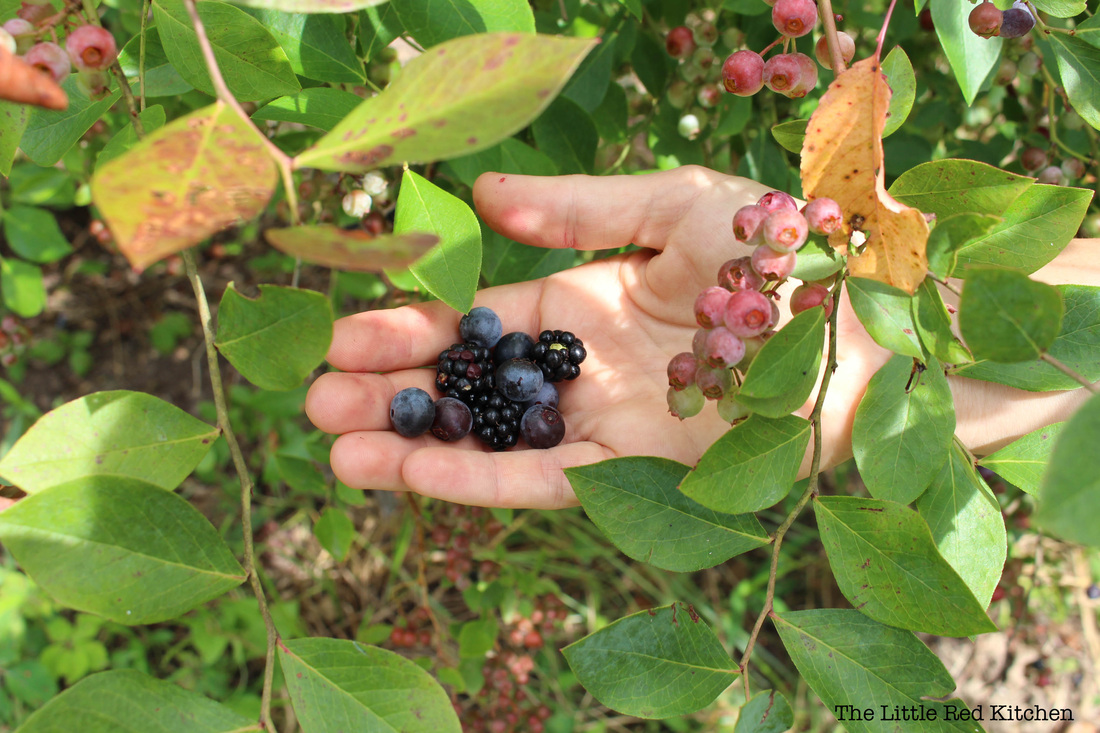
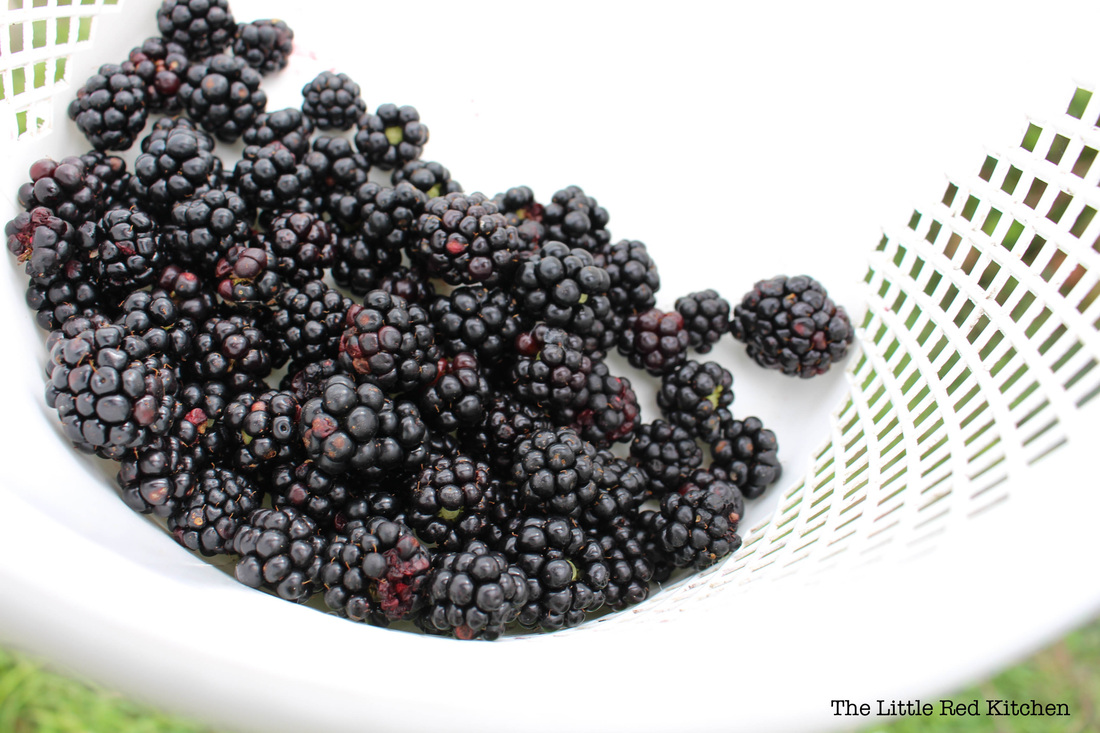
Optional: Go to work, or go do something fun! I went out to pick some local blueberries and blackberries with friends, grocery shop, and bake a pie with those berries (recipe coming soon).
Step 8: Shred it up!
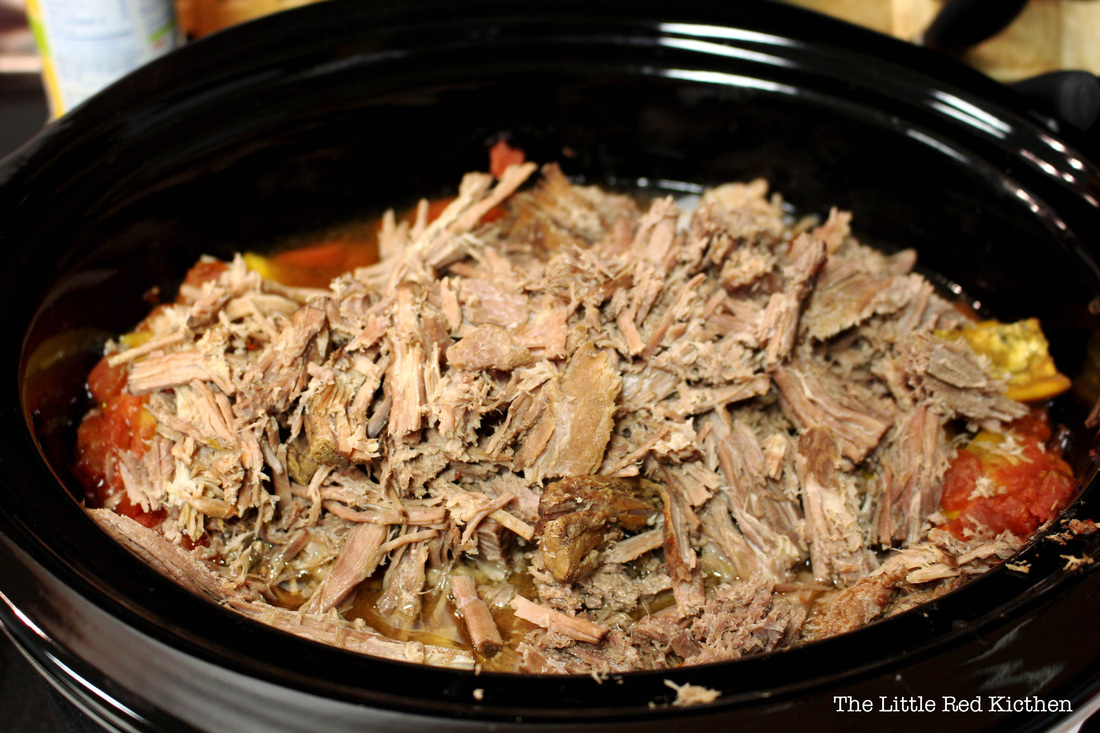
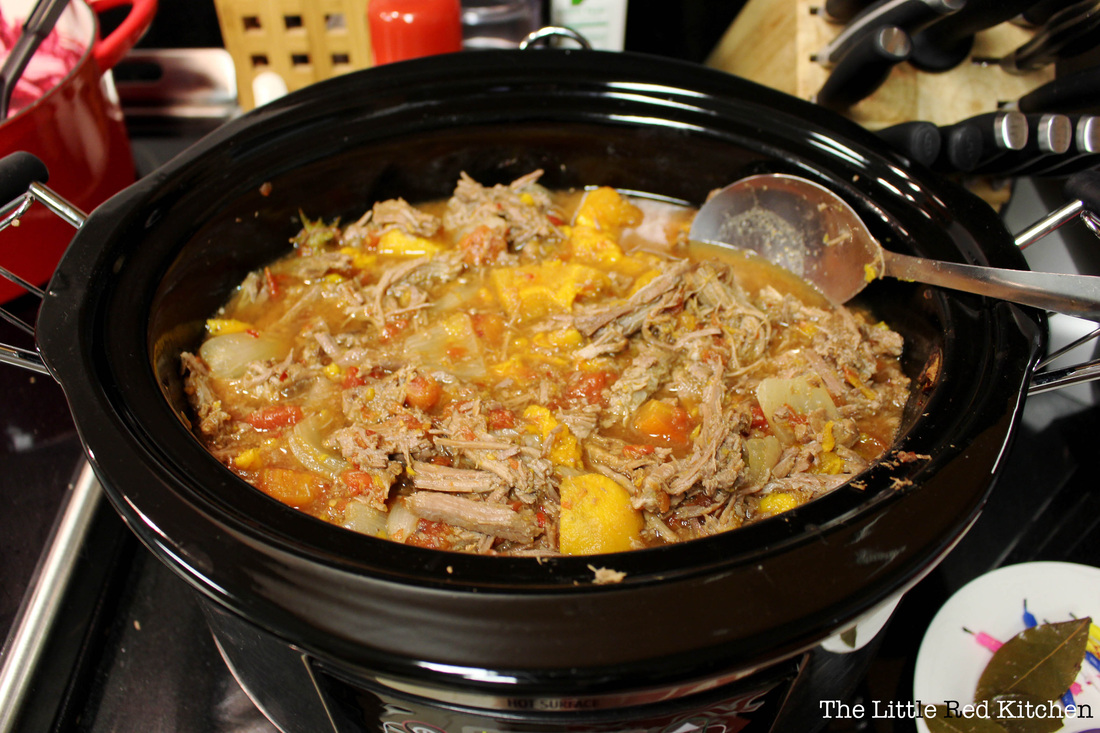
Once your meat has finished cooking, remove the bay leaves, and then carefully remove it from the crock pot (leaving the vegetables and broth). Place it into a large bowl or onto a large place. Using two forks, shred the meat, then return it to the crock pot. Step 9: Mix it in well, and taste. Adjust seasoning if desired. Then, enjoy with crusty bread or a great bottle of (red) wine!
Recipe: 10-minute Slow Cooker Beef Stew Ingredients
3-4 lb bottom round or sirloin roast
2 sweet potatoes, scrubbed, peeled, and roughly chopped
2 yellow onions, peeled, and roughly chopped
2 tsp kosher salt (or to taste-- we love salt, so we salt heavily)
1 tbsp garlic powder
1/2 tsp black pepper
1/2 tsp red pepper flakes (or to taste)
2-3 dried bay leaves, whole
1 large (28oz.) can of (Hunt's) diced tomatoes
14oz water (1/2 of the Hunt's can)
Directions
1. Place your roast in the bottom of a 6-quart crock pot, and pack the chopped vegetables around it (leaving the top of the roast exposed for seasoning).
2. Season the roast with the spices above, or change them to suit your tastes!
3. Cover the roast and vegetables with the diced tomatoes, then fill the can half-way with water, and add it in on top.
4. Cook for 8-9 hours on low, or until the meat is tender enough to be shredded with a fork.
5. Remove the bay leaves and discard. Carefully remove the roast from the crock pot, and place on/in a large plate or bowl*.
6. Shred the roast with two forks and replace in the crock pot, stirring to combine.
7. Enjoy!
*You can also shred the roast directly in the crock pot, but since the liquid is still hot/warm, you avoid burning yourself by doing it separately.
Thanks for reading!
- Kaitlin
|













 RSS Feed